If you’re serious about losing weight you’ll need to increase your daily movement along with following the Crop Top Crunch Time exercises and my nutrition programs.
I designed MOVE app workouts based to be easy and convenient for you to do anywhere in 30 minutes or less while delivering serious results.
There are workouts for all fitness levels that you can do at-home for less than $10 a month.
Get a FREE 7 day trial to check it out for yourself! Download here.
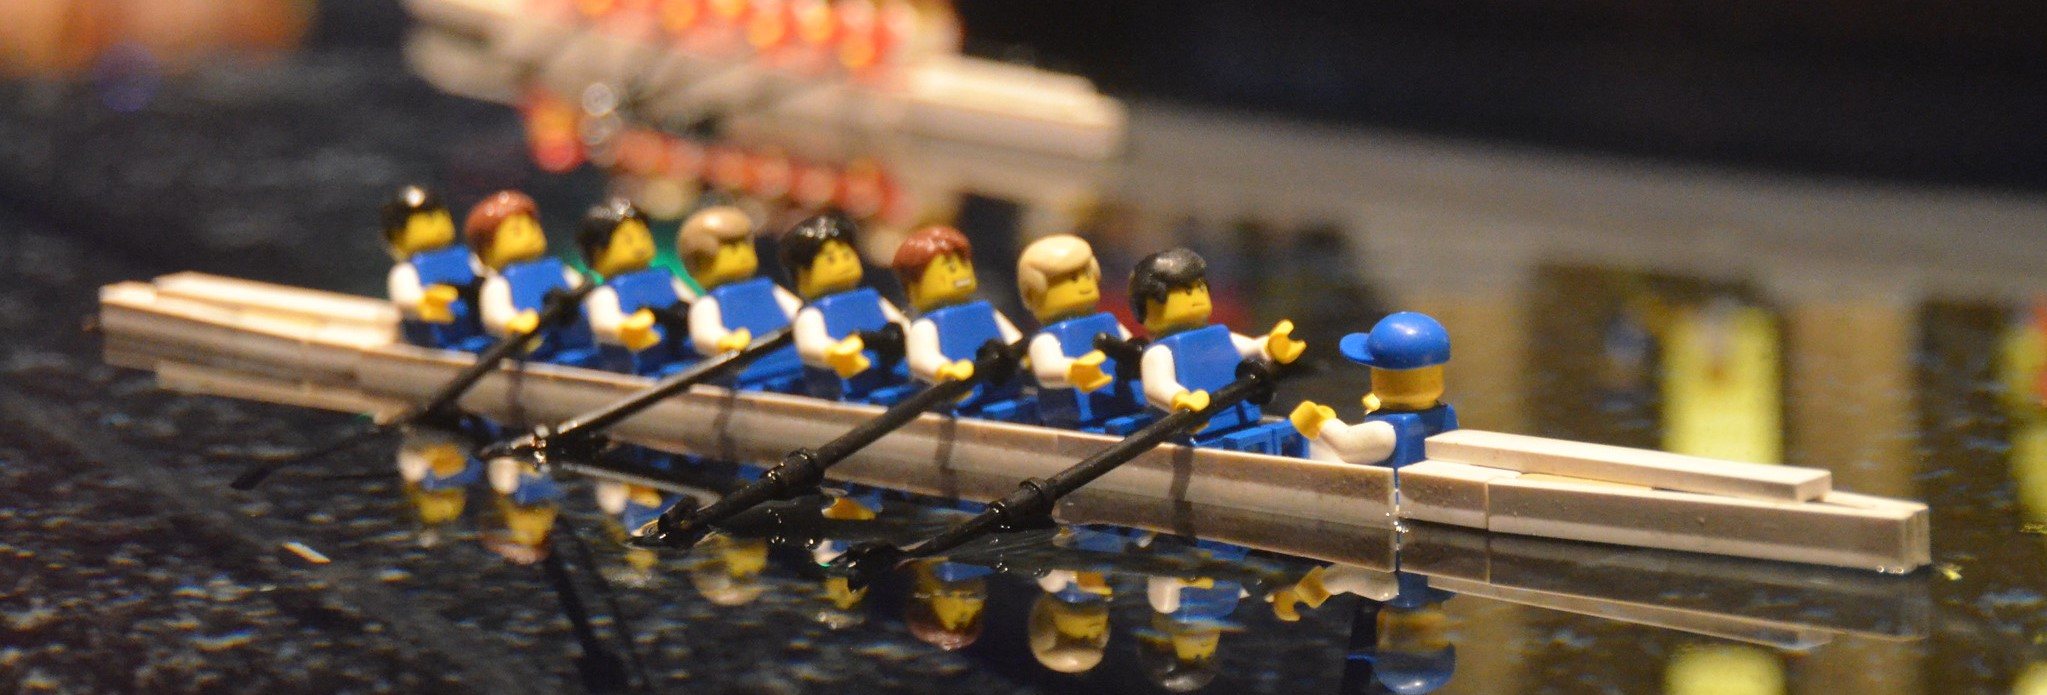
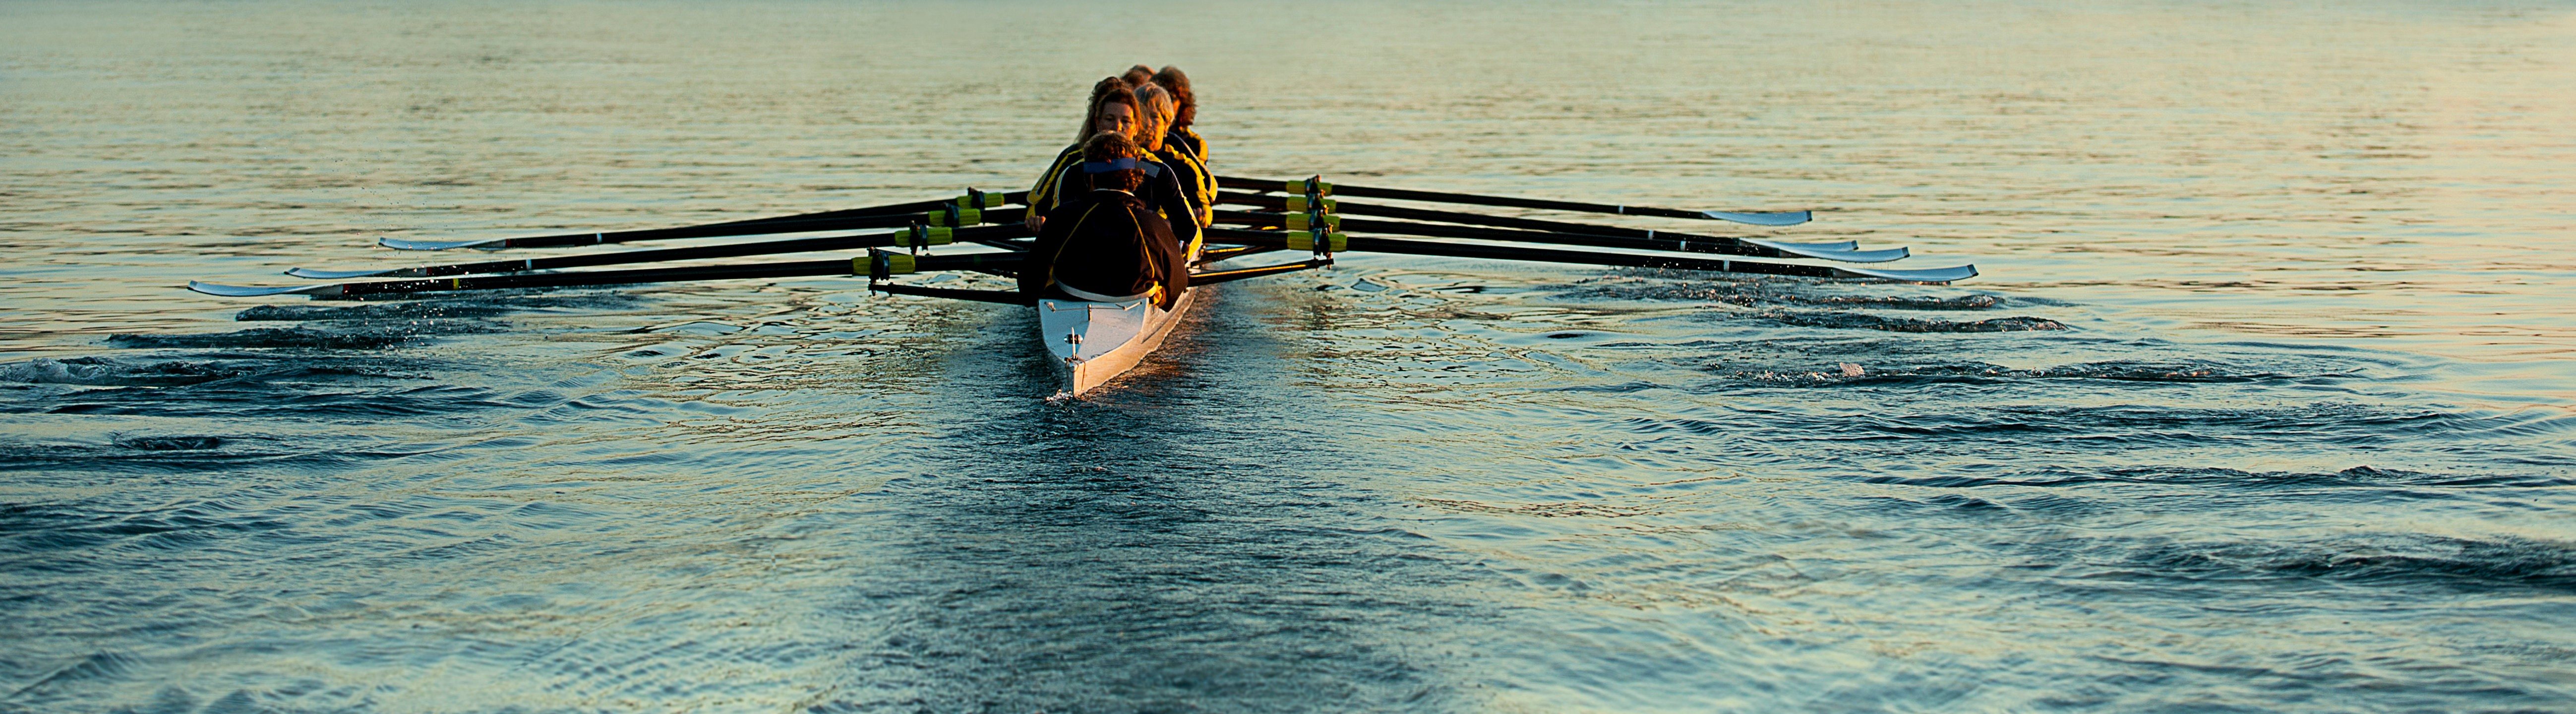
Rowing classes are everywhere. It’s easy to find professional and Olympic athletes hyping up the machine’s ability to provide a full-body workout.
All fine and good…but how do you actually use the thing?
Welp my friend, you’ve come to the right place to find out.
Many clients in our Online Coaching Program tell us they want to start rowing, but they don’t know how. Today, we’ll explain how we get them going with row machine workouts.
She also knows a thing or two about using a rowing machine, since she’s gotten several CrossFit certs (they love the rowing machine at CrossFit).
If you’re going to learn about using a rowing machine, she’s not a bad person to talk to.
But first, let’s back up here a bit…
What Are the Benefits of Using a Rowing Machine?
The rowing machine was originally invented for water rowers to train off-season.
You might hear the indoor rowing machine called an ergometer, or “erg” or “ergo.” They get this name since rowing machines often measure the energy produced from the workout in units of ergs.
They’ve grown in popularity, because this one stationary machine offers a lot of neat features.
For example, the benefits of the rowing machine include:
A Full-Body Workout. If we use proper rowing technique, we’ll hit every major muscle group in our body. Upper, lower, core, we’ll work it all. This is one of the main reasons they’ve become so popular.
Low-Impact. While a workout from a rowing machine can get intense, it’s considered to be little to no impact. That’s why it’s sometimes recommended to patients with osteoarthritis.[1]
Versatility. We can do a lot with an ergometer. We can train for duration and/or intensity. We even do a HIIT workout. Or we can combine it with bodyweight movements in a circuit. Plus, since some of them fold up, they’re perfect for those who need to train in small spaces.
Alright, let’s now go over some terminology so you know what’s what with the ergometer.
Rowing Machine 101: Terms to Know
When it comes to the rowing machine, there’s some vocabulary that would be worth discussing quickly.
First, let’s chat about the rower itself.
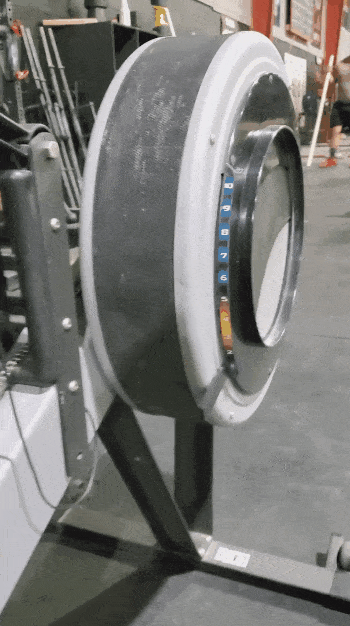
Here Are the Parts of the Rowing Machine:
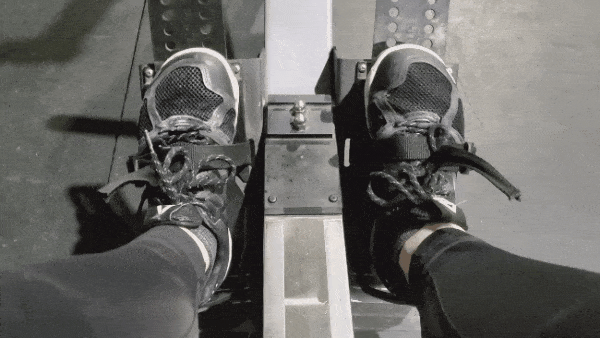
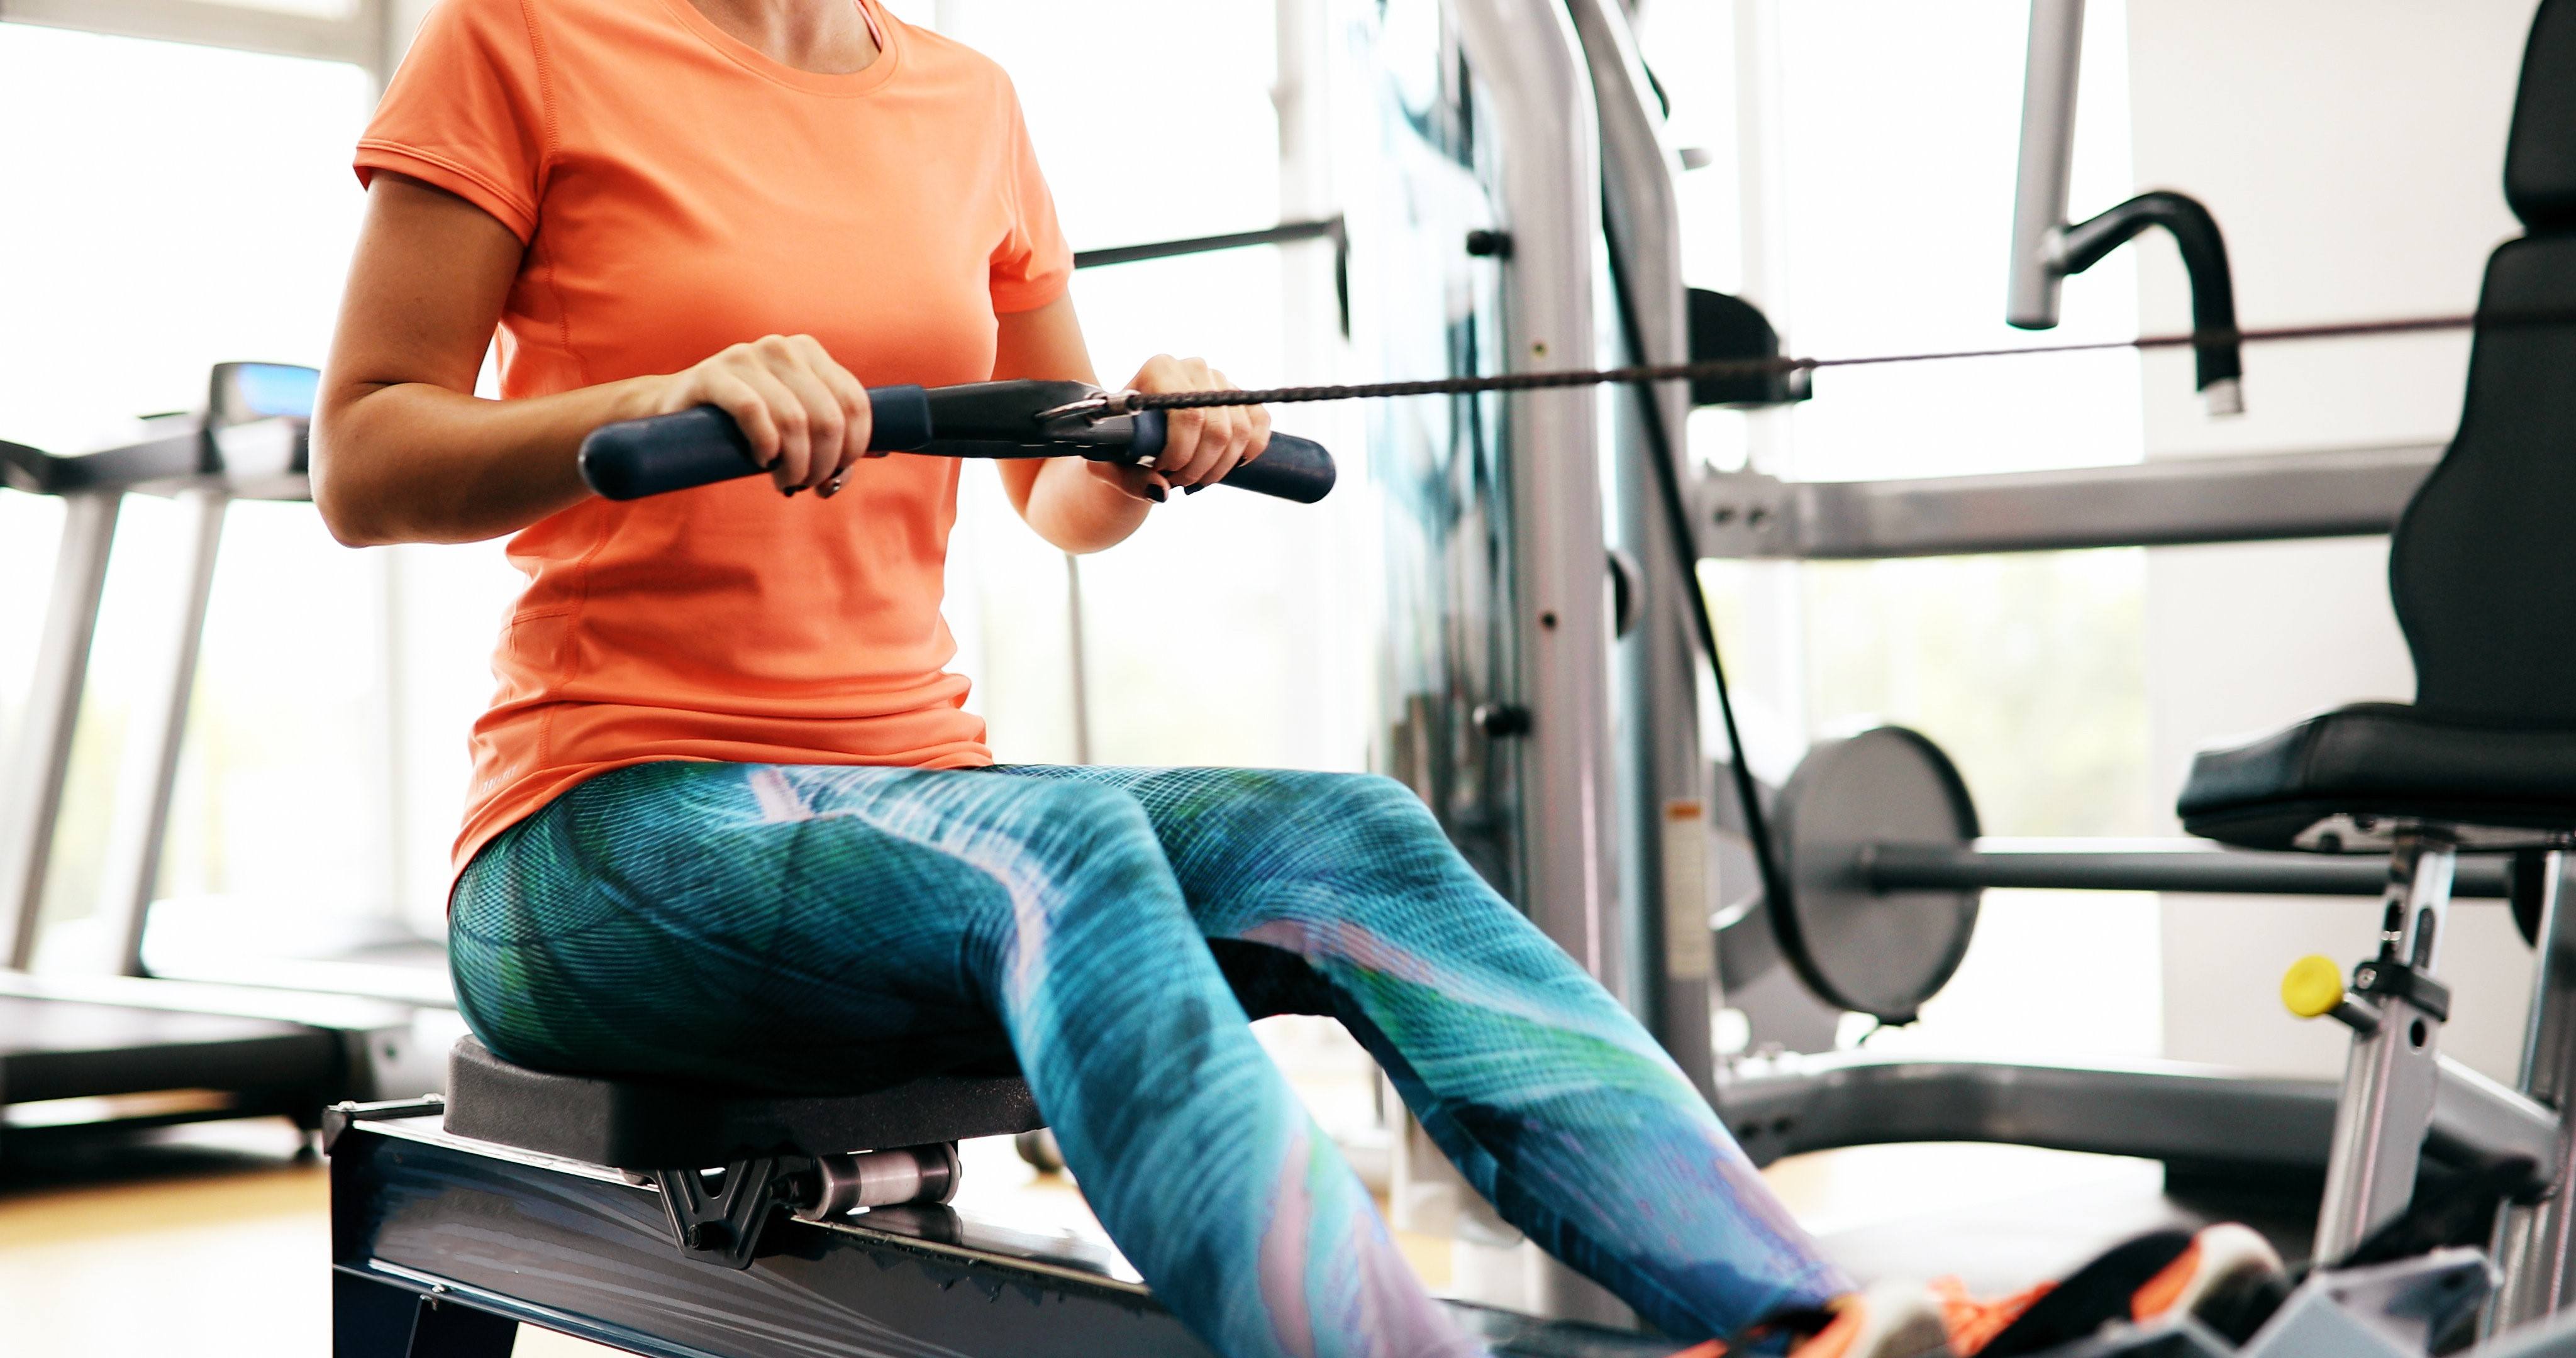
#1) Foot Plate – no matter the rower, there will be a place for you to strap your feet in.
You’ll want to set your feet so that the strap goes over the ball of your foot. This will allow you to have the most powerful stroke.
You should be able to lift your heel in this position.
#2) Handle – also called “the bar.” This replicates the handles of an oar.
Your hands should be approximately shoulder-width apart.
#3) Rail – the central beam of the rower, which allows the seat to roll forward and back.
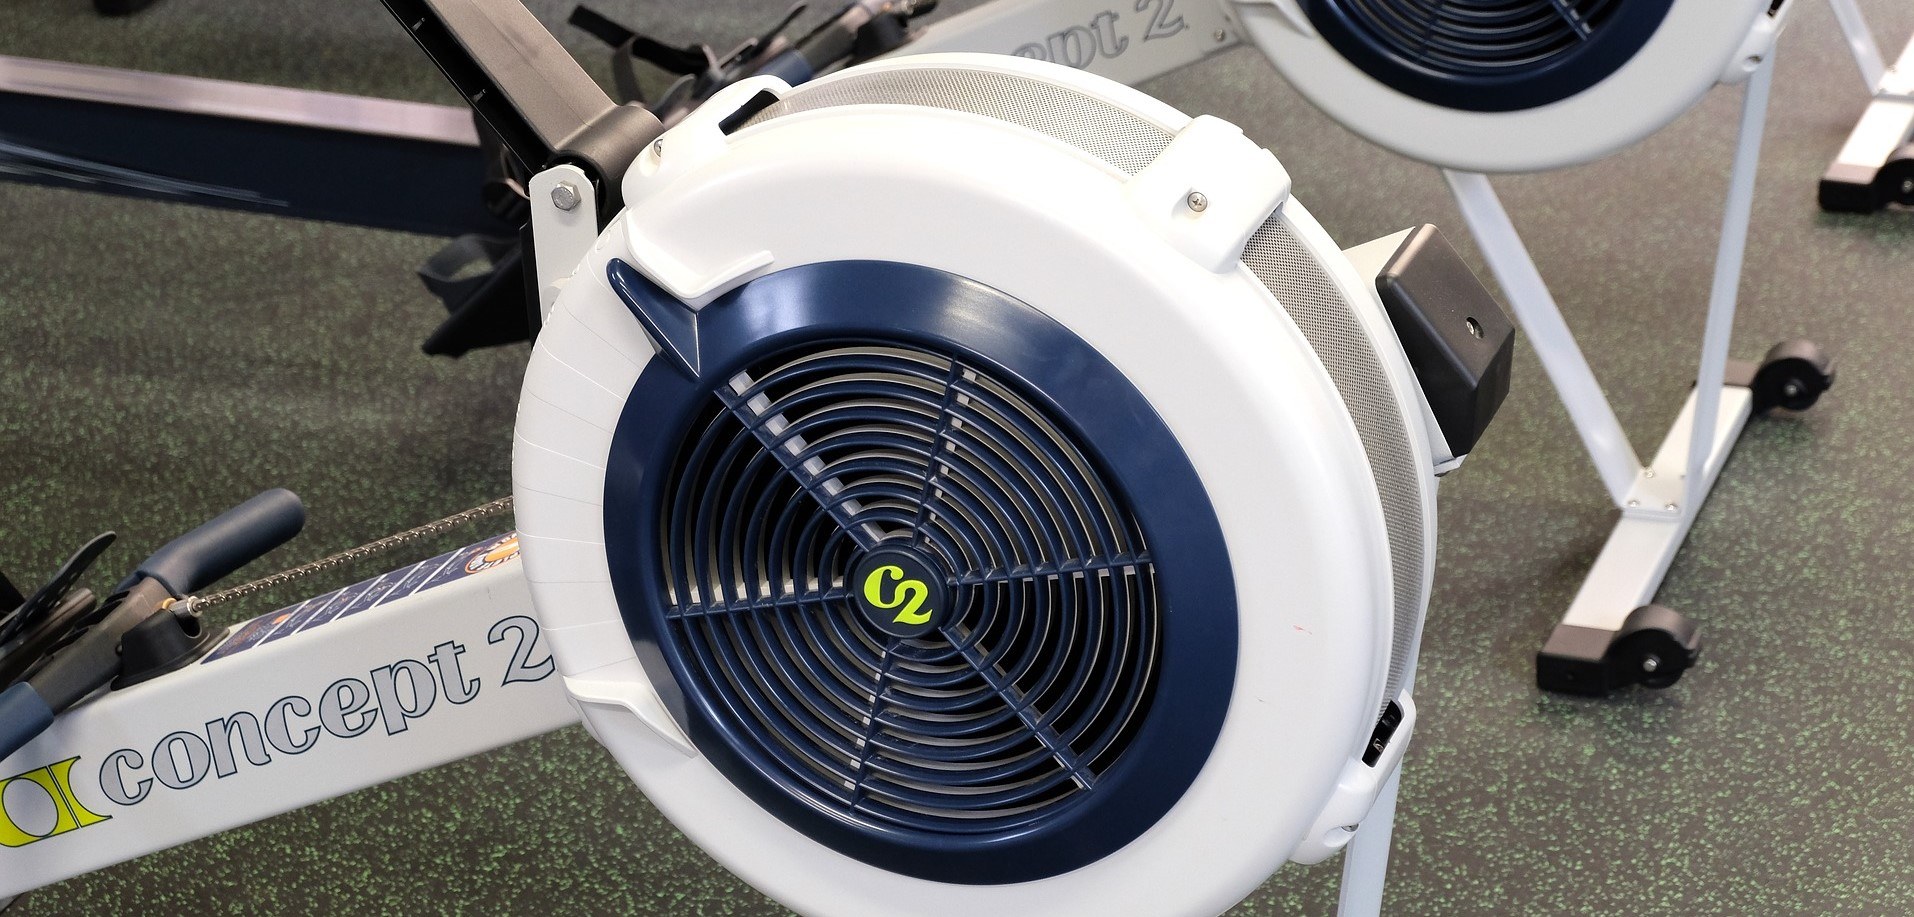
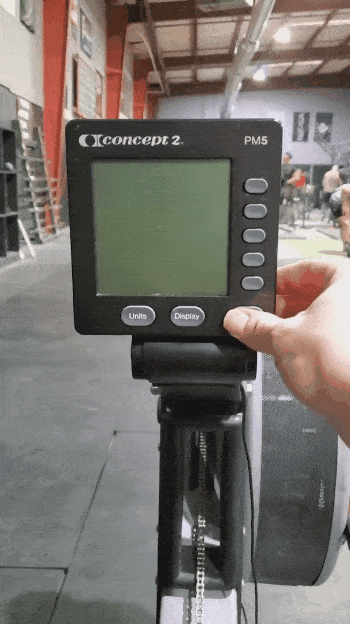
#4) Display Monitor – while these will differ from model to model, the rower will normally have a screen to show some basic info:
Strokes per minute (Stroke Rate)
Split Time (more on this momentarily)
Duration of workout
Etc.
For the Concept2 model – the rower Coach Staci demonstrates above – you can hit any button and select “Just Row.”
This will be the easiest way to get going.
#5) The Damper – The lever on the side of the flywheel housing (or fan cage) that controls airflow.
The difference in Damper settings:
The higher the setting, the more air is allowed to flow. This requires more work to spin the flywheel.
The lower the setting, the less air is allowed to flow. This requires less work to spin the flywheel.
Think of this sort of like bicycle gears – it affects how the rowing feels but does not necessarily reflect the resistance:
A setting of one will feel fast and easier to pull, but you’ll need to move quickly to generate power.
That said, cranking the damper up to ten doesn’t mean a better workout either. It just means a tougher pull – like trying to move a rowboat.
We recommended you aim for a Damper setting between 3 and 5 (which is also where most competitive rowers have it).
Note: some indoor rowers use a water tank to create resistance, so any similar Damper setting controls the amount of water moving through the system. You can still use the same recommendations for damper numbers.
More on that here:
Next, let’s talk about some terminology for the sport of rowing itself.
Rowing has been around for centuries and a lot of the vocabulary has carried over to the indoor sport.
Rowing Terms to Know:
#1) Split
Split time refers to the time it takes to row 500 meters, also known as the “split per 500.” This will likely be shown prominently on your Display Monitor.
If the number goes down, it means you’re going faster! Woot.
#2) Strokes Per Minute (SPM)
This is also called Stroke Rating and it’s exactly what it sounds like: the number of strokes you take per minute.
A higher SPM doesn’t necessarily mean you’re going faster – you can also go faster by putting more power into each stroke.
#3) Paddle (or Rest)
Normally in the sport of rowing, you never stop completely. You just row or “paddle” a little bit easier.
However, if you need to stop completely in your workout, don’t stress it. It’s fine to even get off the rower from time to time…it’s not actually a boat.
You do you.
Next, we need to discuss the four parts of the rowing stroke, but we’ll jump to a new section for that.
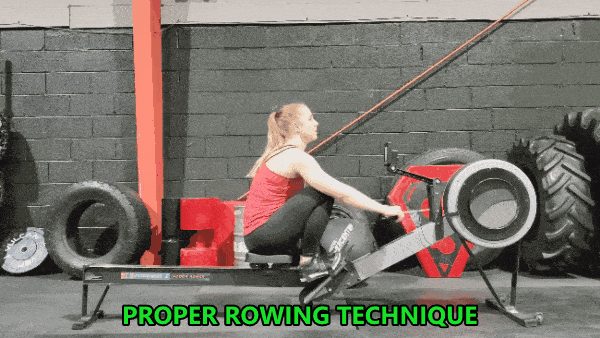
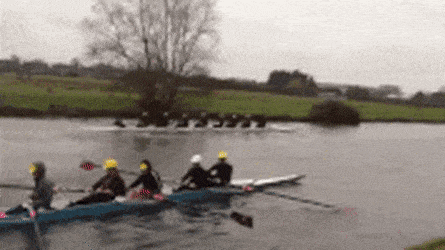
The Four Parts of the Rowing Stroke
The rowing stroke is broken out into four parts:
The Catch
The Drive
The Finish
The Recovery
It’ll look like this:
Let’s cover each.
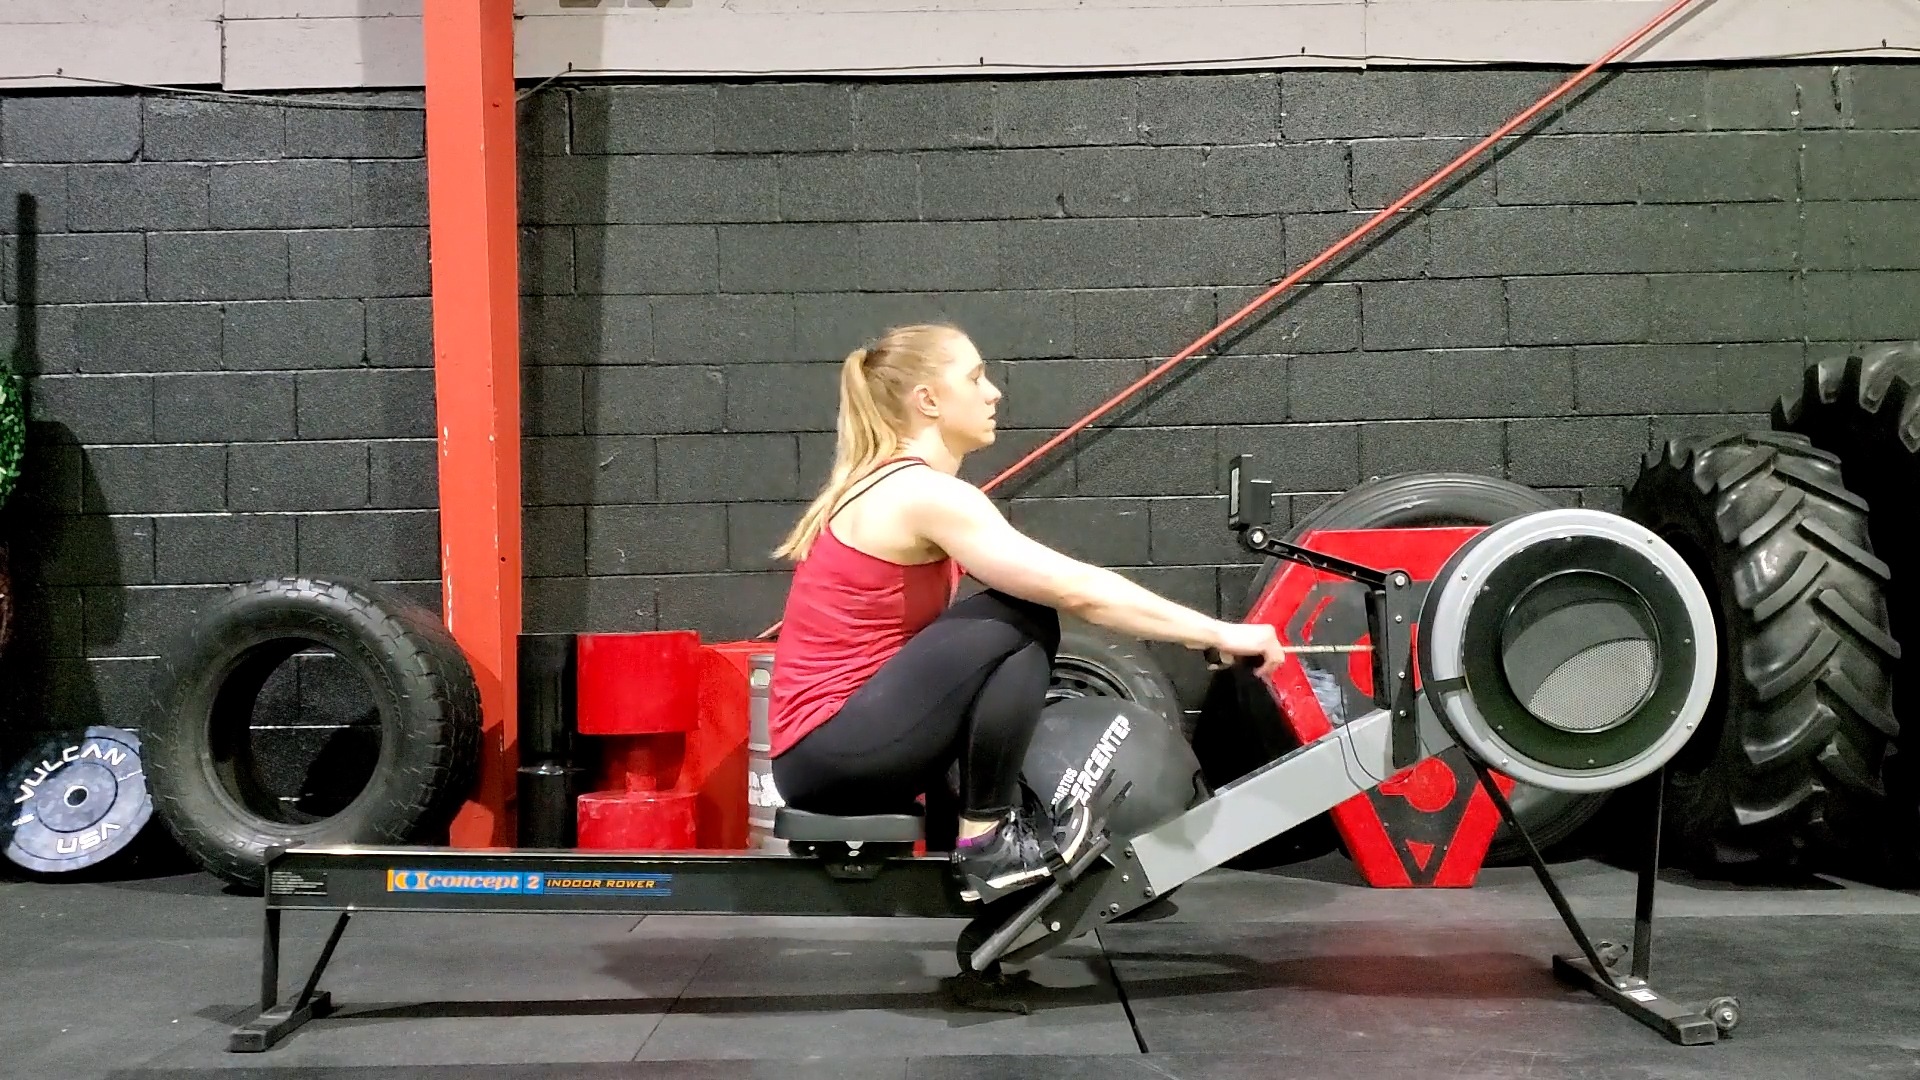
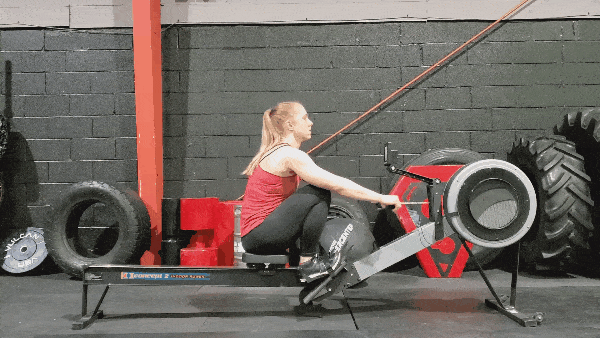
#1) The Catch
This is the start of the stroke:
Our knees are bent and our shins are roughly vertical.
Our body leans forward slightly to about a 1 o’clock position and our arms are straight.
Like so:
This puts us in the ideal position to generate power.
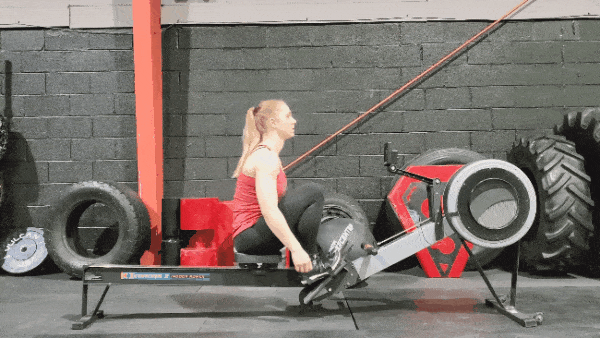
#2) The Drive
As the name would suggest, this is where we’ll be driving and generating power for the stroke.
The order in which we generate power is key:
It should go legs first
Then lean back with the body
Then pull with the arms
It’ll look like this:
They should blend smoothly right into each other, so a good reminder is:
Legs
Body
Arms
A great drill to practice the Drive:
Start with JUST the legs:
THEN the legs and a slight backward lean with the body:
FINALLY, the legs, body, and arm pull together:
This can be done with or without the rowing handle.
Common mistakes with the Drive:
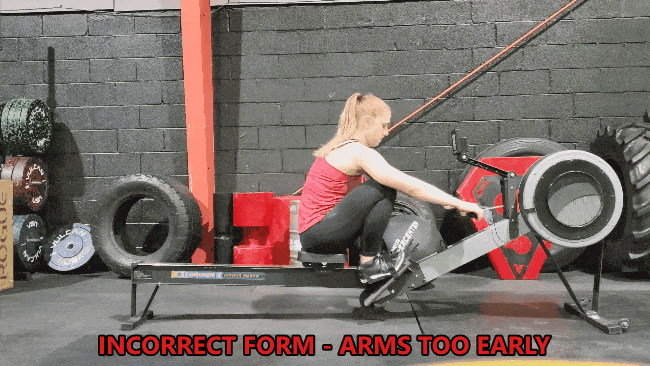
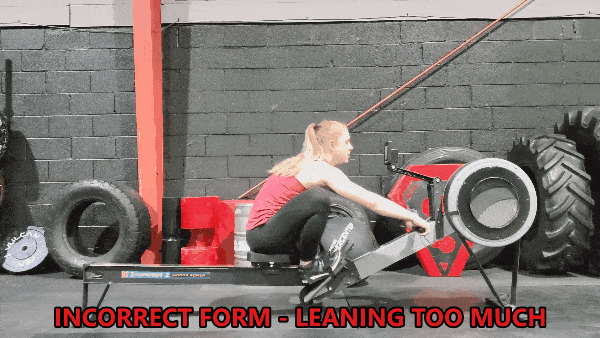
A) Pulling hard with the arms first. We’ll see the elbows bend early. This greatly decreases the amount of power we can put into the stroke.
We want to keep the arms straight and wait until the handle passes the knees BEFORE we first bend the arms.
B) Letting the body pull forward while we’re driving with the legs.
Instead, we want to keep a strong and stable midsection so that we can go smoothly from the leg drive to the body lean.
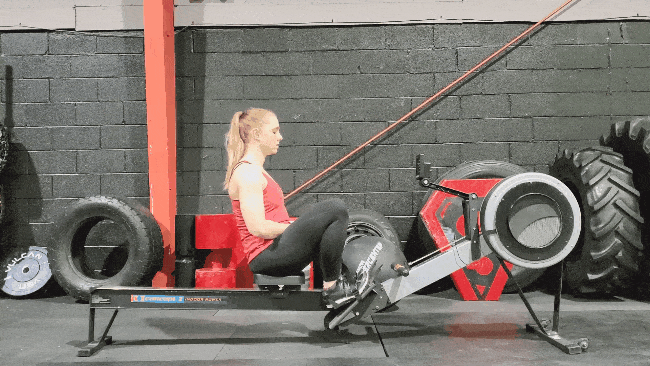
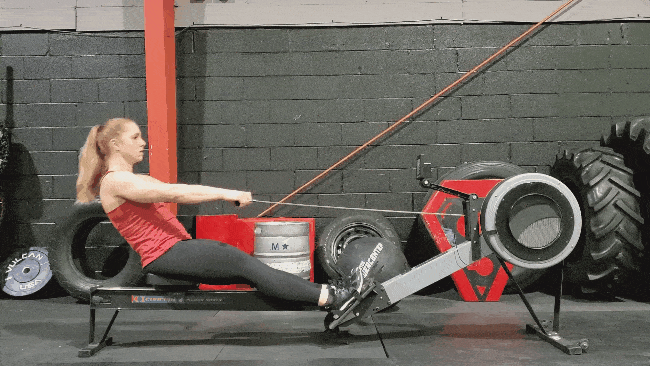
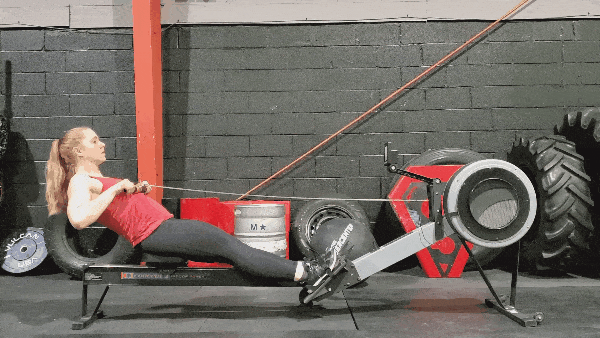
#3) The Finish
This will be our position after the Drive:
Our legs are extended and our body is leaning back slightly.
The handle is about at our solar plexus.
Our shoulders are down and our wrists are straight.
It’ll look like this:
A great drill to practice the Finish:just work on the arm motion.
Keep the legs extended and lean back slightly. Then pull with just the arms.
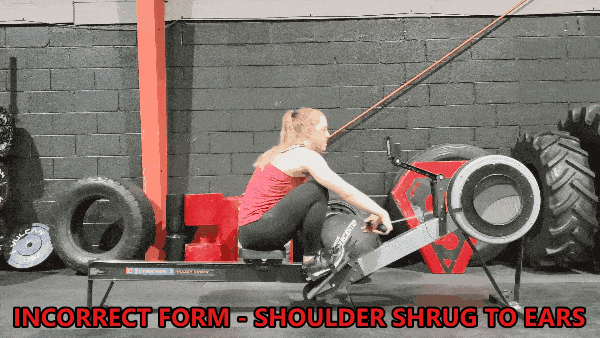
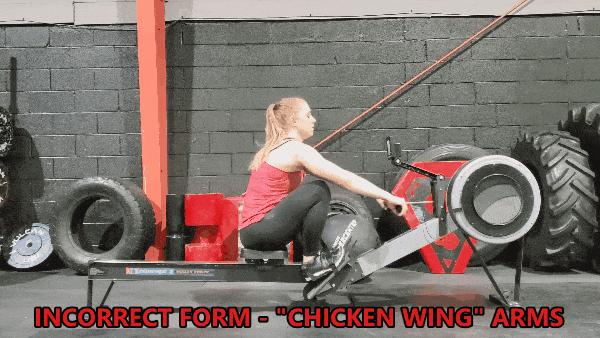
Common mistakes with the Finish:
A) Shrug the shoulders up by the ears.
This is often accompanied by bent wrists and chicken wing arms.
Instead, we want the shoulders down and the elbows closer to the sides, with enough space between the arms and body for a grapefruit to fit.
B) Pulling the handle too high– to the neck or face.
We want the handle down at the solar plexus, not up orbiting in the solar system!
C) Leaning back too far – we’re not trying to perform the one-person luge here!
We only need to lean back slightly, at about an 11 o’clock position.
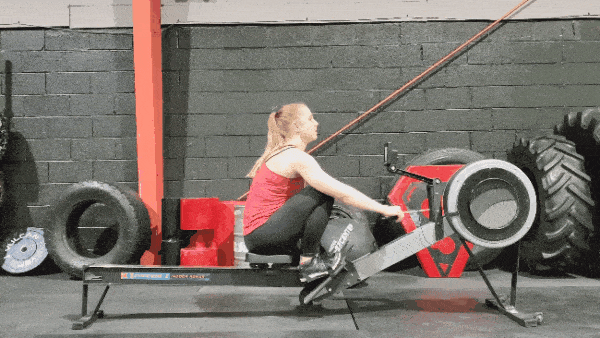
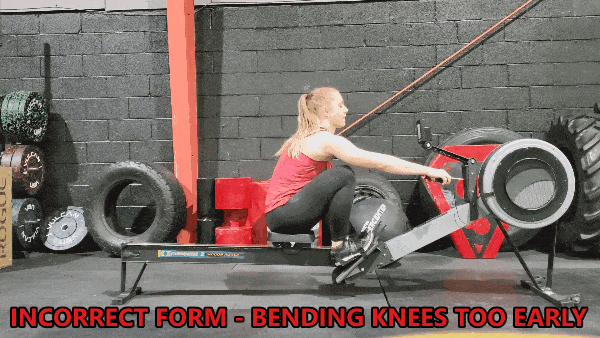
#4) The Recovery
This is how we return back to the starting position.
Just as we had a proper order for the Drive – legs, body, arms – we’ll have a proper order for the recovery by reversing it – arms, body, legs.
Straighten the arms, then lean the body forward slightly, and finally bend the legs to head back to the Catch.
Common mistakes with the Recovery: Bending the legs too early when recovering from the stroke. You’ll know you’re doing this when you have to lift the handle up and over the knees.
Instead, wait for the handle to PASS the knees before fully bending the legs.
There you have it, thefour parts of the rowing stroke.
You’ll get better at this as you go, I promise.
Rowing is like golf: the relentless pursuit of the perfect stroke.
One way to check your form would be to record yourself doing a rowing stroke.
If it looks close to the gifs and videos found in this guide, you’re doing great!
Oh, and if you want an expert to review your form, you can do so in our snazzy Coaching app.
You can learn more here:
When to Add the Rowing Machine to Your Workout
A rowing machine can fit into our workout in all sorts of ways.
If you want to give the rowing machine a whirl, including it as part of your warm-up wouldn’t be a bad idea. Since it’s a full-body exercise, it’s a great way to prep our body for the workout ahead.
To warm up with the rower, aim for about 5-10 minutes at a steady pace.
Once you get the hang of the rower, you can look to incorporate it with some of these ideas:
#1) Interval Training
Interval training or HIIT is all about flipping between intensity.
Going hard one moment, then resting another.
So after your warm-up, you could row intensely for two minutes, rest or “paddle” for a minute or two, then back to intensity.
A fun way to do this is to build up the duration and then pull it back with a “Meter Pyramid.”
To Row a Meter Pyramid:
One minute of intensity, followed by one minute of paddle.
Two minutes of intensity, followed by two minutes of paddle.
Three minutes of intensity, followed by three minutes of paddle.
Four minutes of intensity, followed by four minutes of paddle.
Three minutes of intensity, followed by three minutes of paddle.
Two minutes of intensity, followed by two minutes of paddle.
One minute of intensity, followed by one minute of paddle.
If you start this off with a 5-minute warm-up, it’ll take about 37 minutes.
We could aim for 3-4 circuits here, but even 1-2 is a great start.
#3) Steady State
This is exactly what it sounds like: rowing at a constant pace.
After a warm-up, find a pace that you can stay with. Then stay with it.
A good frame of mind here would be about 50% of your effort, but don’t overthink this.
Put on a good podcast or your favorite playlist, find a Stroke Rate you can maintain for 10-30 minutes, and get rowing.
You can pretend you’re in a competition if it helps!
Also, mix and match! The important thing is that you’re doing some type of workout. Don’t fret if it doesn’t fit into the exact format you find here or on other websites.
Should a Beginner Use a Rowing Machine? (Next Steps)
There you have it, my friend.
You now have everything you need to get started rowing.
Don’t overstress if you’re not doing anything 100% right as you start.
Like anything, you’ll get better at it as you go.
Plus, it’s not like you’ll be ejected into the water from an indoor rower.
But, if down the road you do want to take it outside, there are all sorts of leagues and clubs you can join.
It could be a great way to get out and make friends!
Granted, you’ll need SOME type of body of water around you, but if you live next to a lake or large river, there’s likely a team out there that would love to meet you.
Practice indoors for a bit, then take 20 seconds of courage to put yourself out there.
What’s 20 seconds of courage?
We explain it all to you in this video:
Oh, and if you want to continue having Nerd Fitness propel your journey, here are three ways we can help:
#1) OurOnline Coaching Program: a coaching program for busy people to help them make better food choices, stay accountable, and get healthier, permanently.
If ever you come across a snazzy piece of equipment and what to learn how to use it, your very own coach can help you!
Plus, they can guide your nutrition and help you level up all areas of your life.
You can schedule a free call with our team so we can get to know you and see if our coaching program is right for you. Just click on the image below for more details:
#2) If you want an exact roadmap for building a full-body workout, check out NF Journey. Our fun habit-building app tells you exactly what days to exercise, what days to rest, and helps you track it all so you know if it’s working for you.
Interested?
Try your free trial right here:
#3) Join the Rebellion! We need good people like you in our community, the Nerd Fitness Rebellion.
Sign up in the box below to enlist and get our Rebel Starter Kit, which includes all of our “work out at home” guides, our Strength Training 101 eBook, and much more!
Get your Nerd Fitness Starter Kit
The 15 mistakes you don’t want to make.
Full guide to the most effective diet and why it works.
Complete and track your first workout today, no gym required.
Sharing some of the good stuff we’ve found lately on Amazon. I always love to hear about new things you’re loving, too, so please shout out in the comments below!
Hi hi! How are you?? I hope you’re having a great morning so far! I have to get some things ready for a photo shoot – we’re taking pics for the landing pages + social for my new program – and some end-of-the-year events.
For today’s post, I wanted to share some of the recent Amazon fashion and fun finds. Amazon has come a looooong way in their fashion game, and while I tend to invest more in the classics, it’s the perfect option for trendier items when I don’t want to spend a ton. As far home goods and essentials go, it just makes life so much easier.
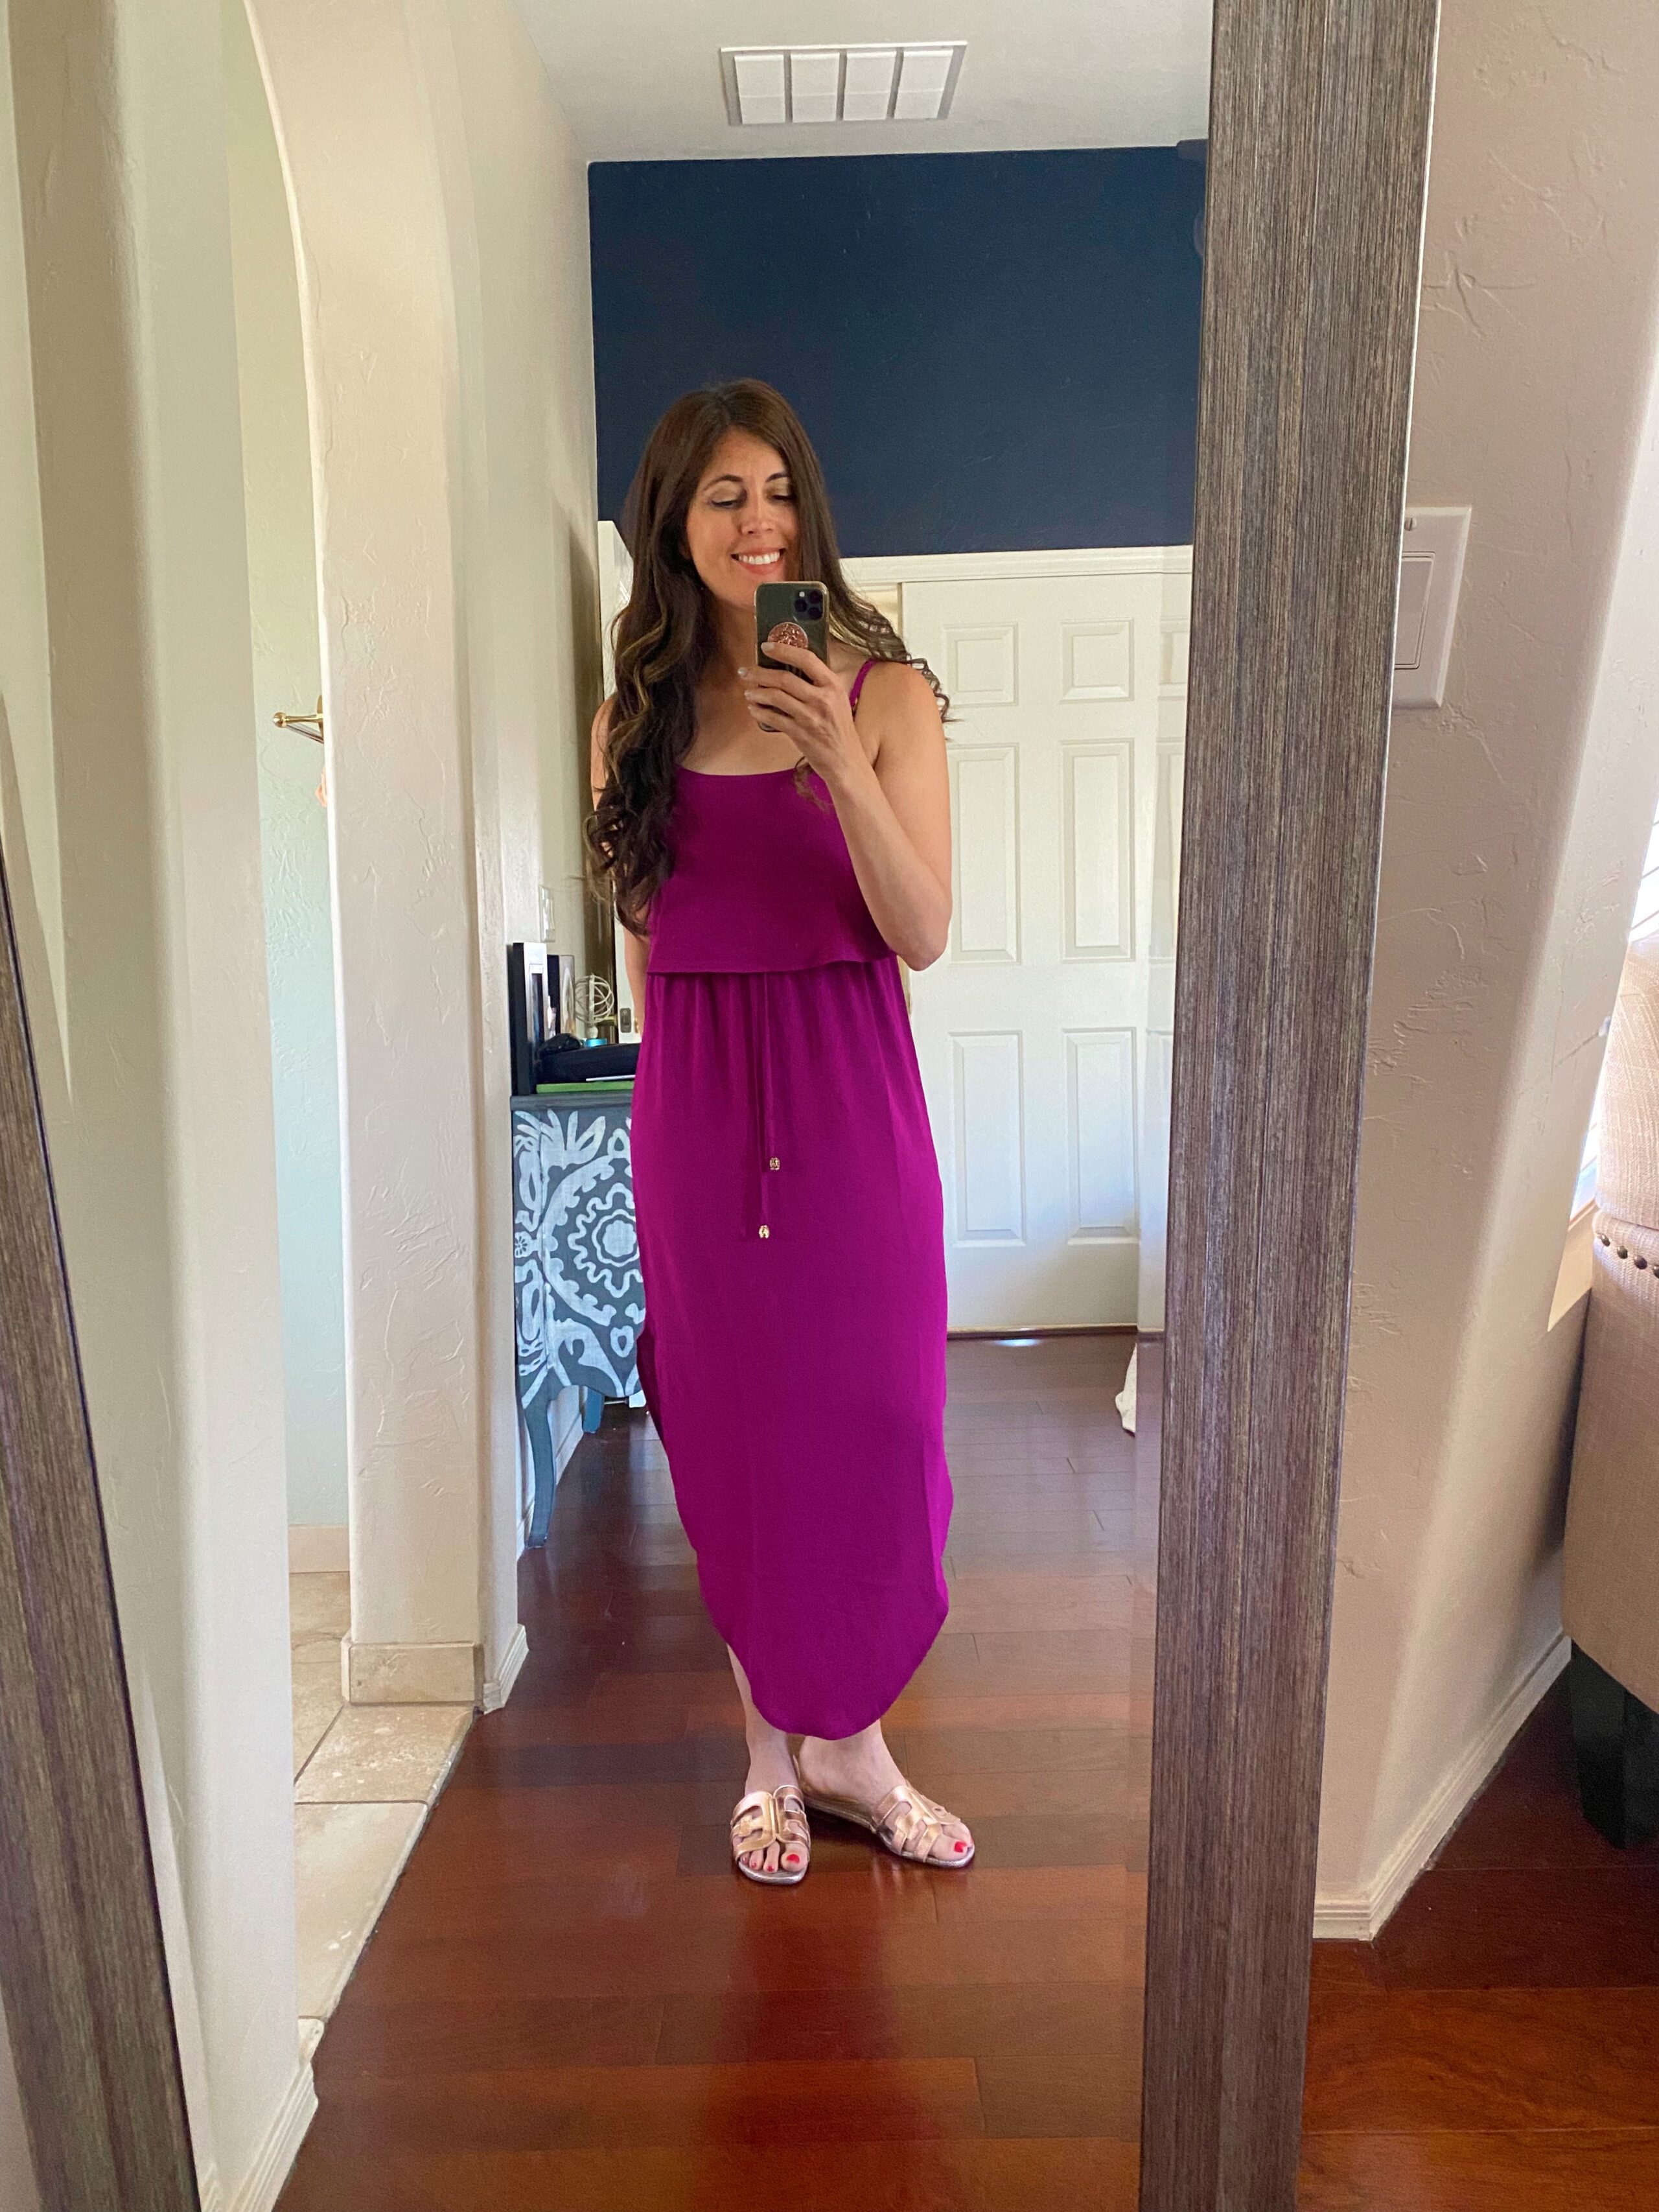
I ordered this color because I’m trying to lean into the whole *deep winter* color scheme. It’s a perfect casual beach dress or coverup; perfect to layer with your swimsuit and wear to lunch. It’s super lightweight and flattering, plus they have a ton of colors.
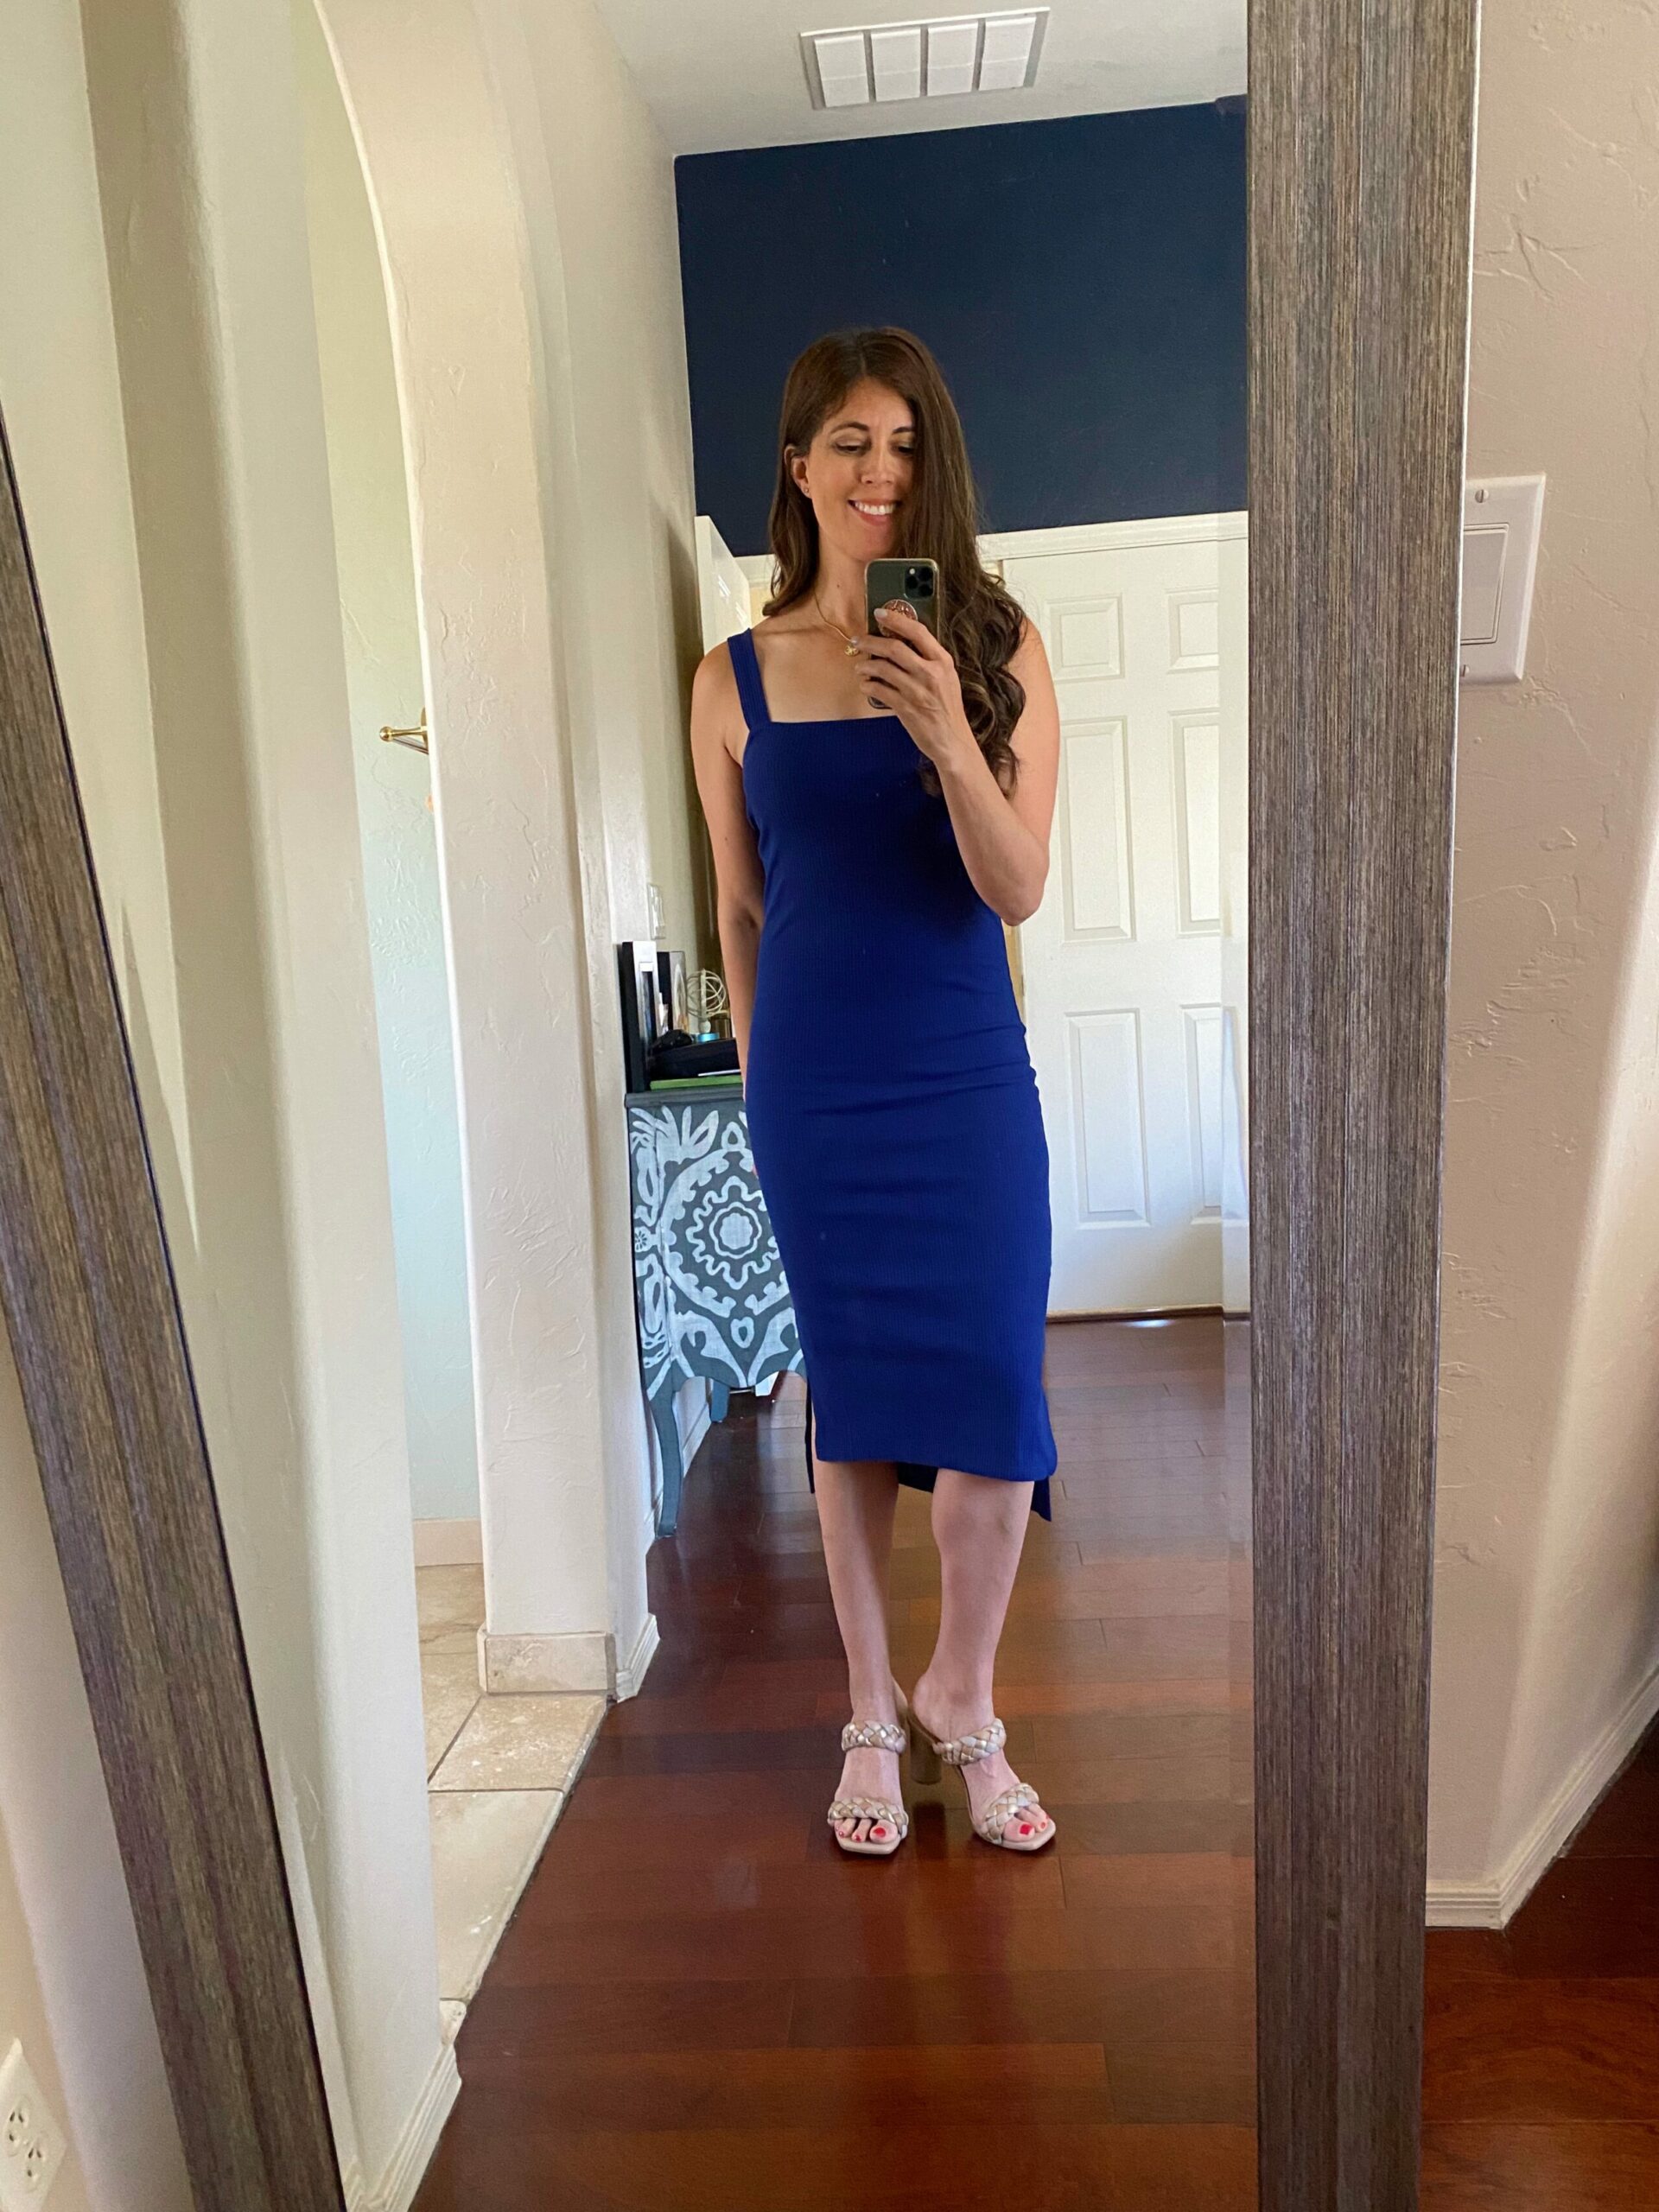
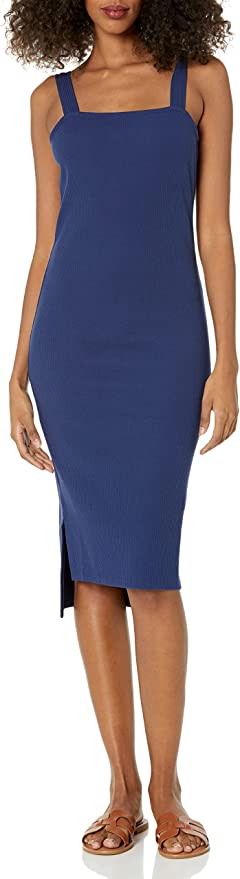
Love the square neck of this dress! It’s more form-fitting (I always wear Spanx with things like this. It’s always worth it, I promise!) and they also offer it in a lot of colors. The fabric is much nicer than I was expecting, too.
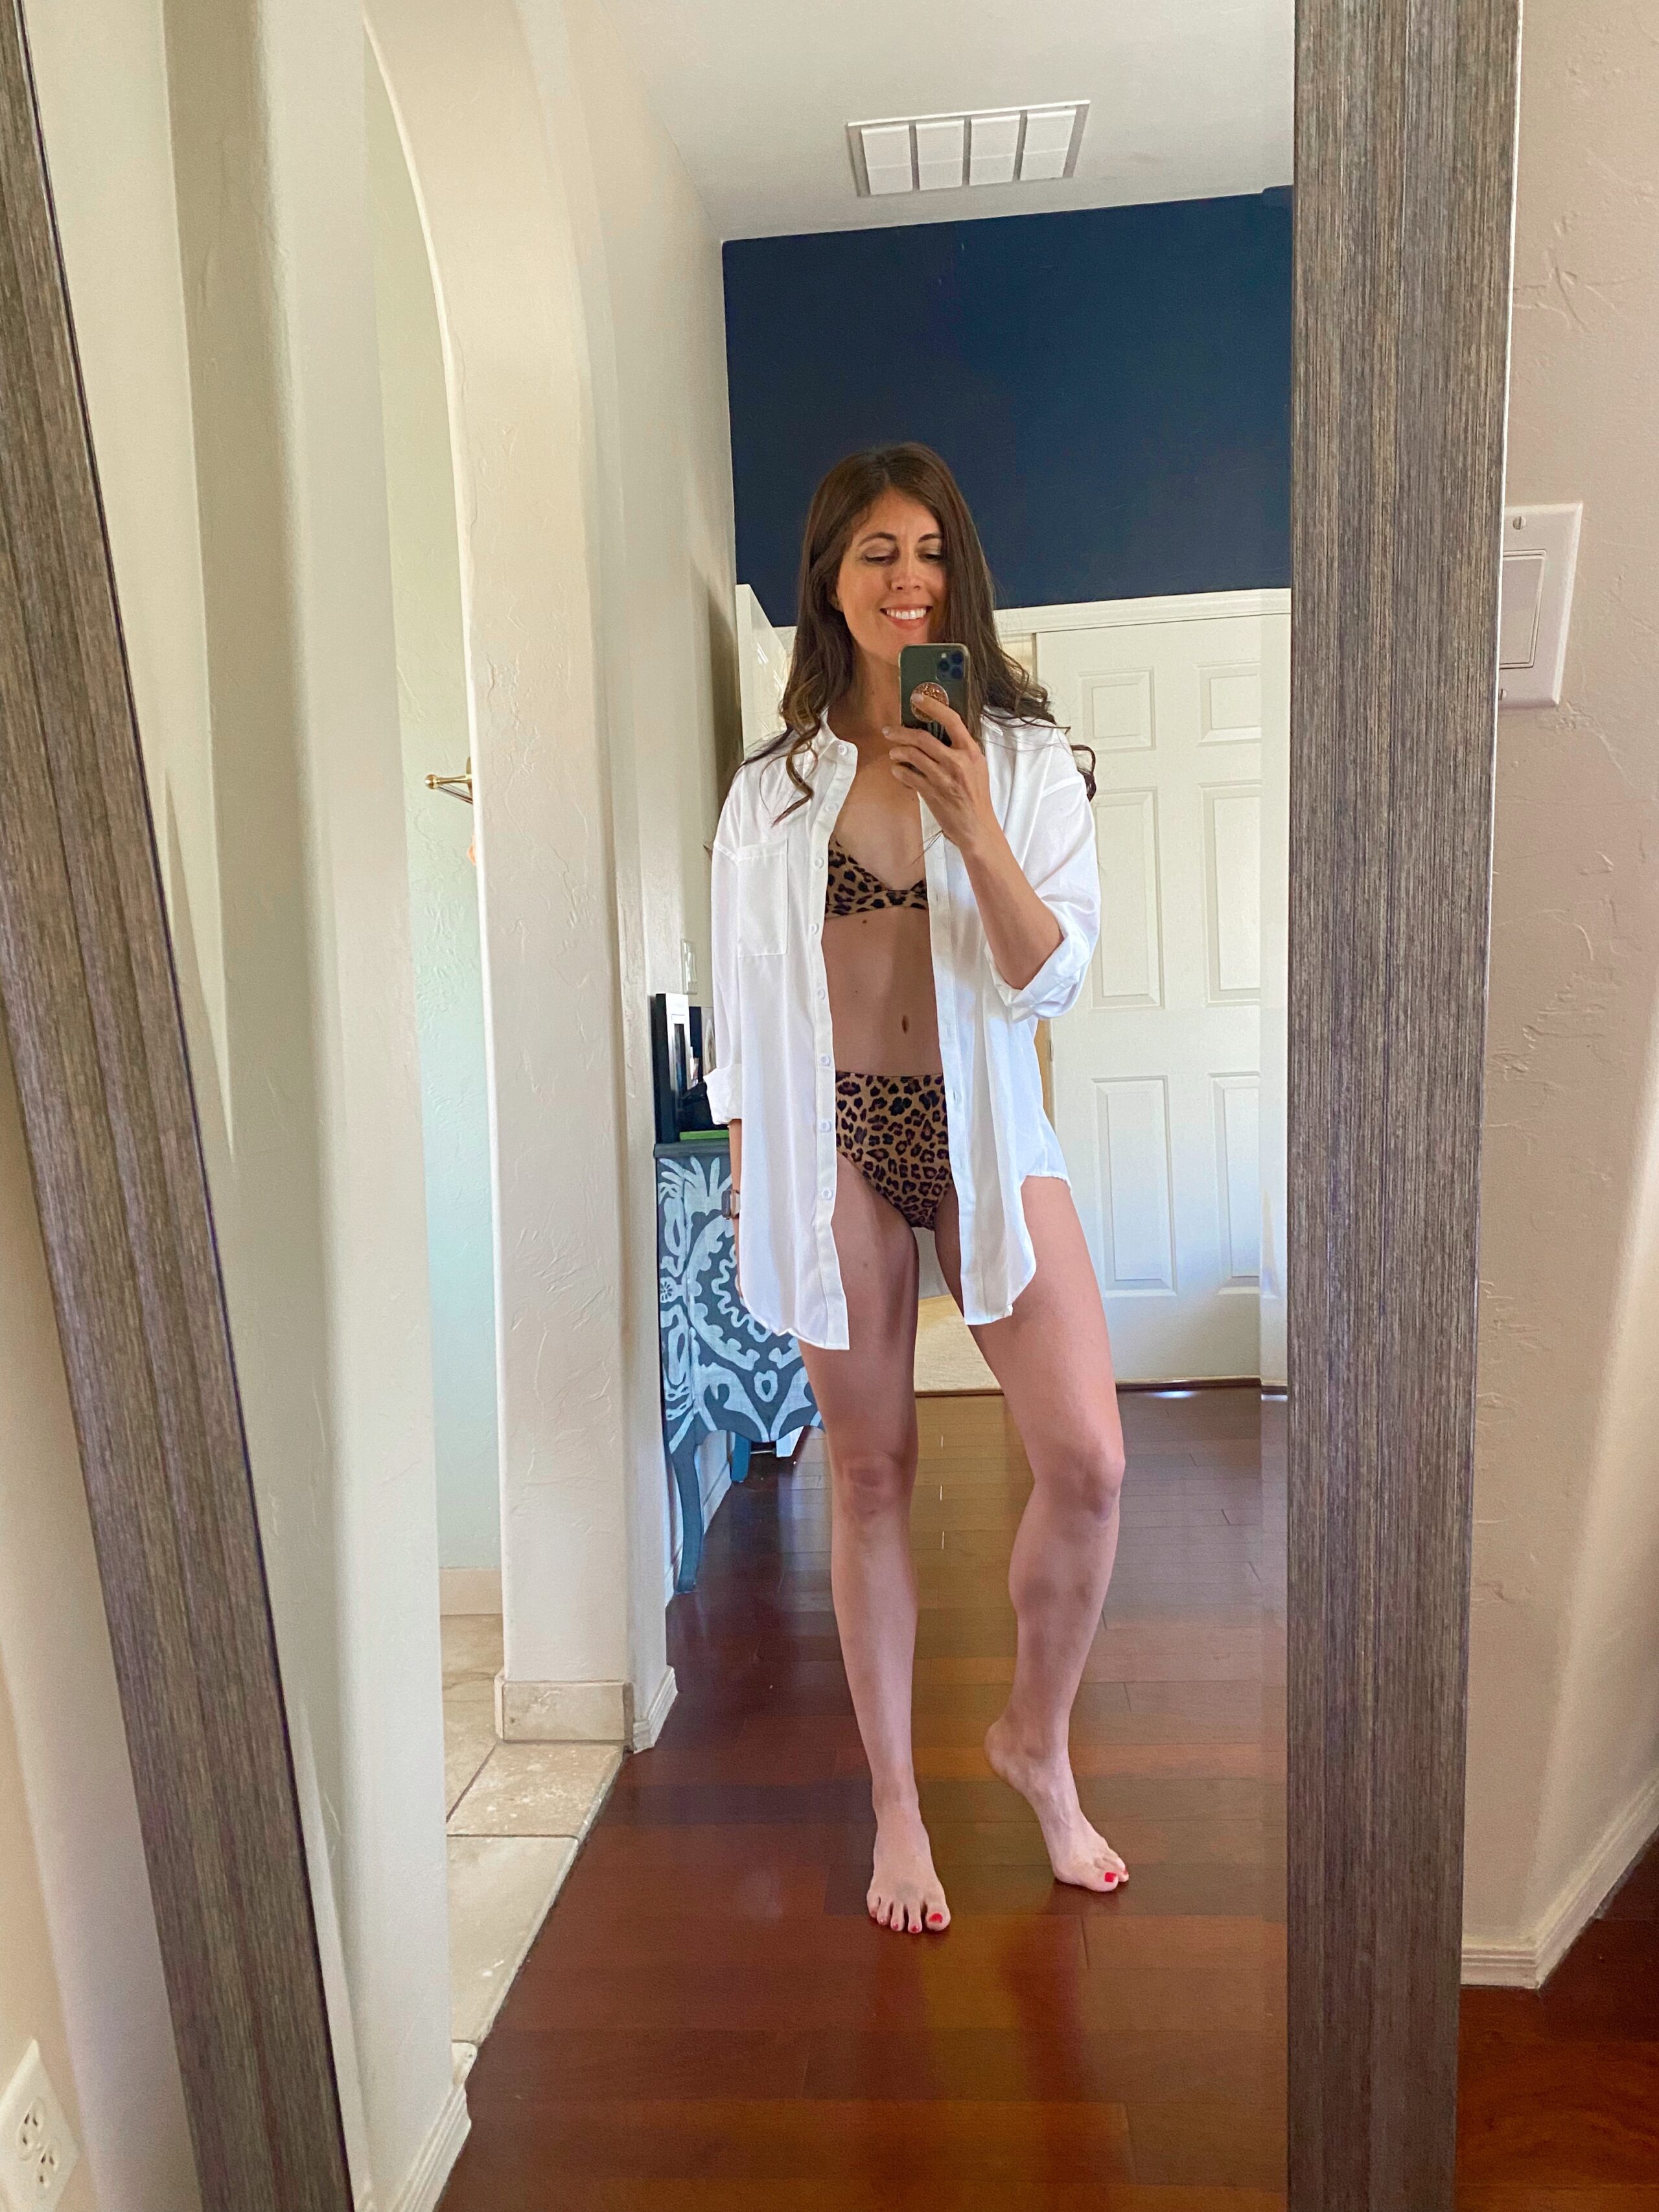
I’m super picky about button-up shirts and this one isn’t too sheer, and is oversized enough to wear as a swim coverup. I’ll also wear it with shorts and sandals this summer.
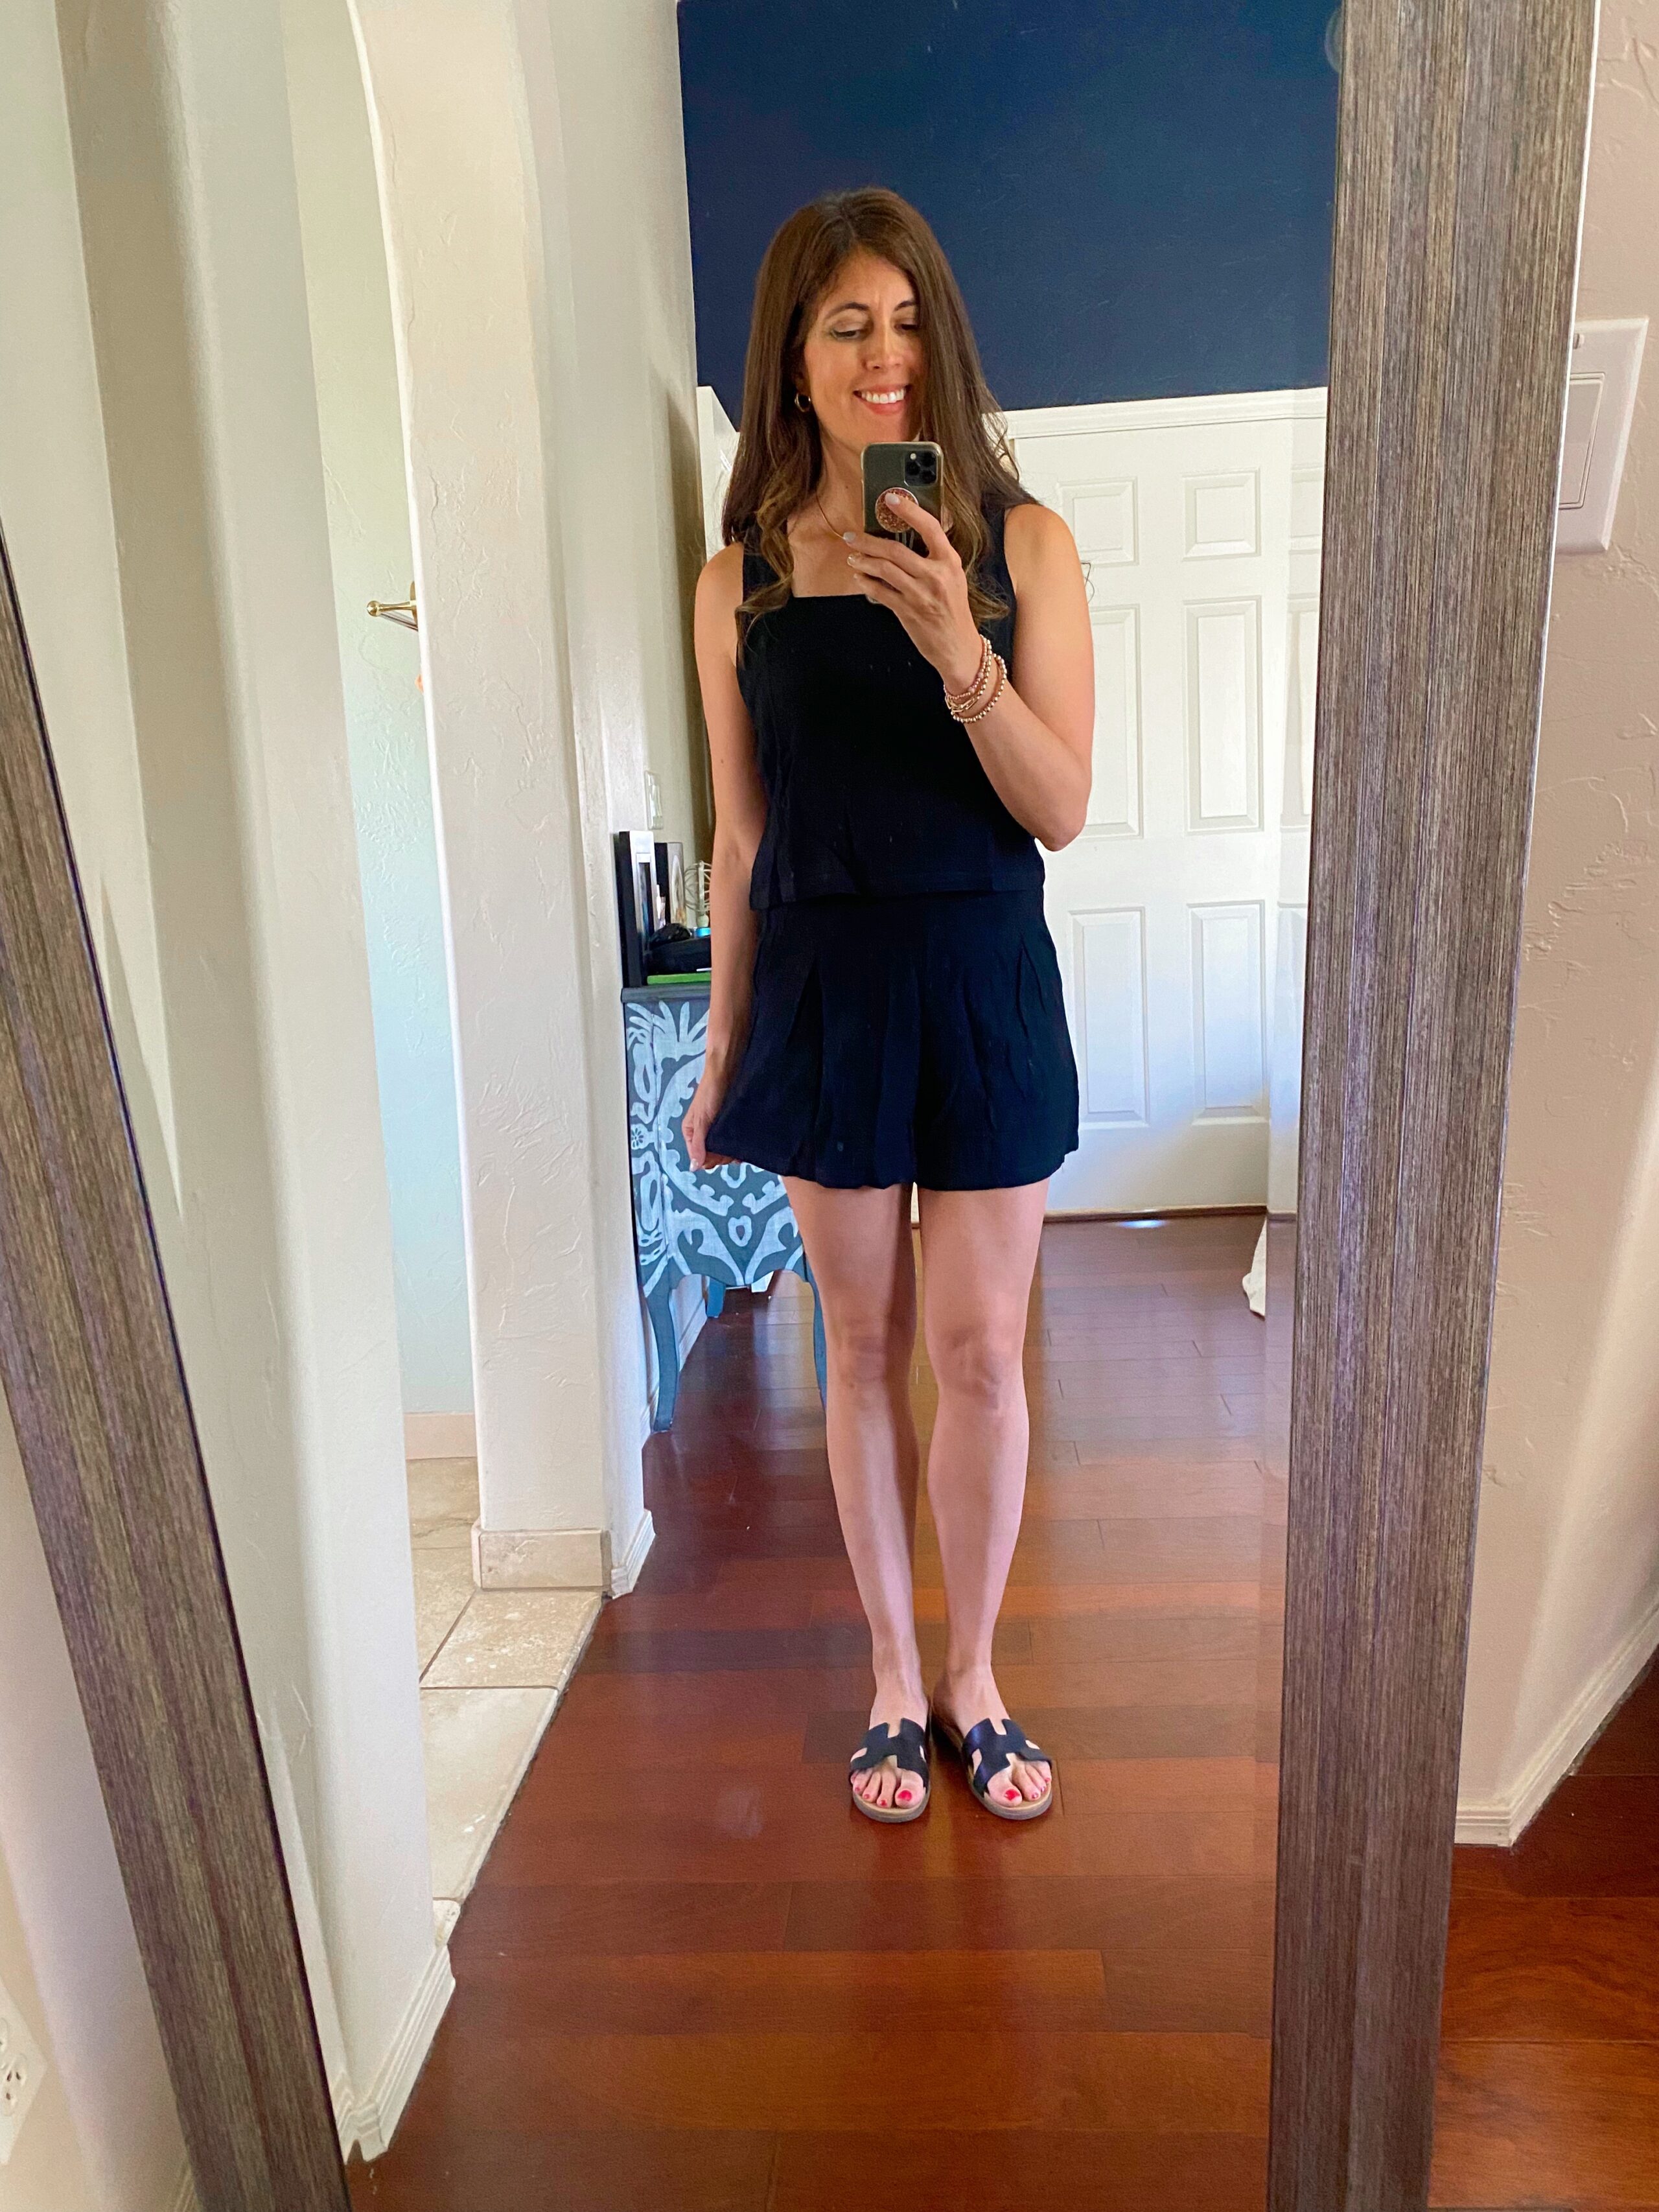
This is by far my latest favorite Amazon purchase. It’s lightweight – so great for summer – and is a square neck cropped tank with shorts. The shorts have an elastic waistband and a zipper. It’s also very flattering and easy to dress up with platforms and jewelry, or wear with sneakers or sandals. I also ordered a navy blue one to wear with white sneakers!
I’ve gone through many pairs of these Bay slide sandals and while the rose gold color might be a bit overdone, I still wanted it. I like that they match everything and are easy to throw on with a dress or shorts.
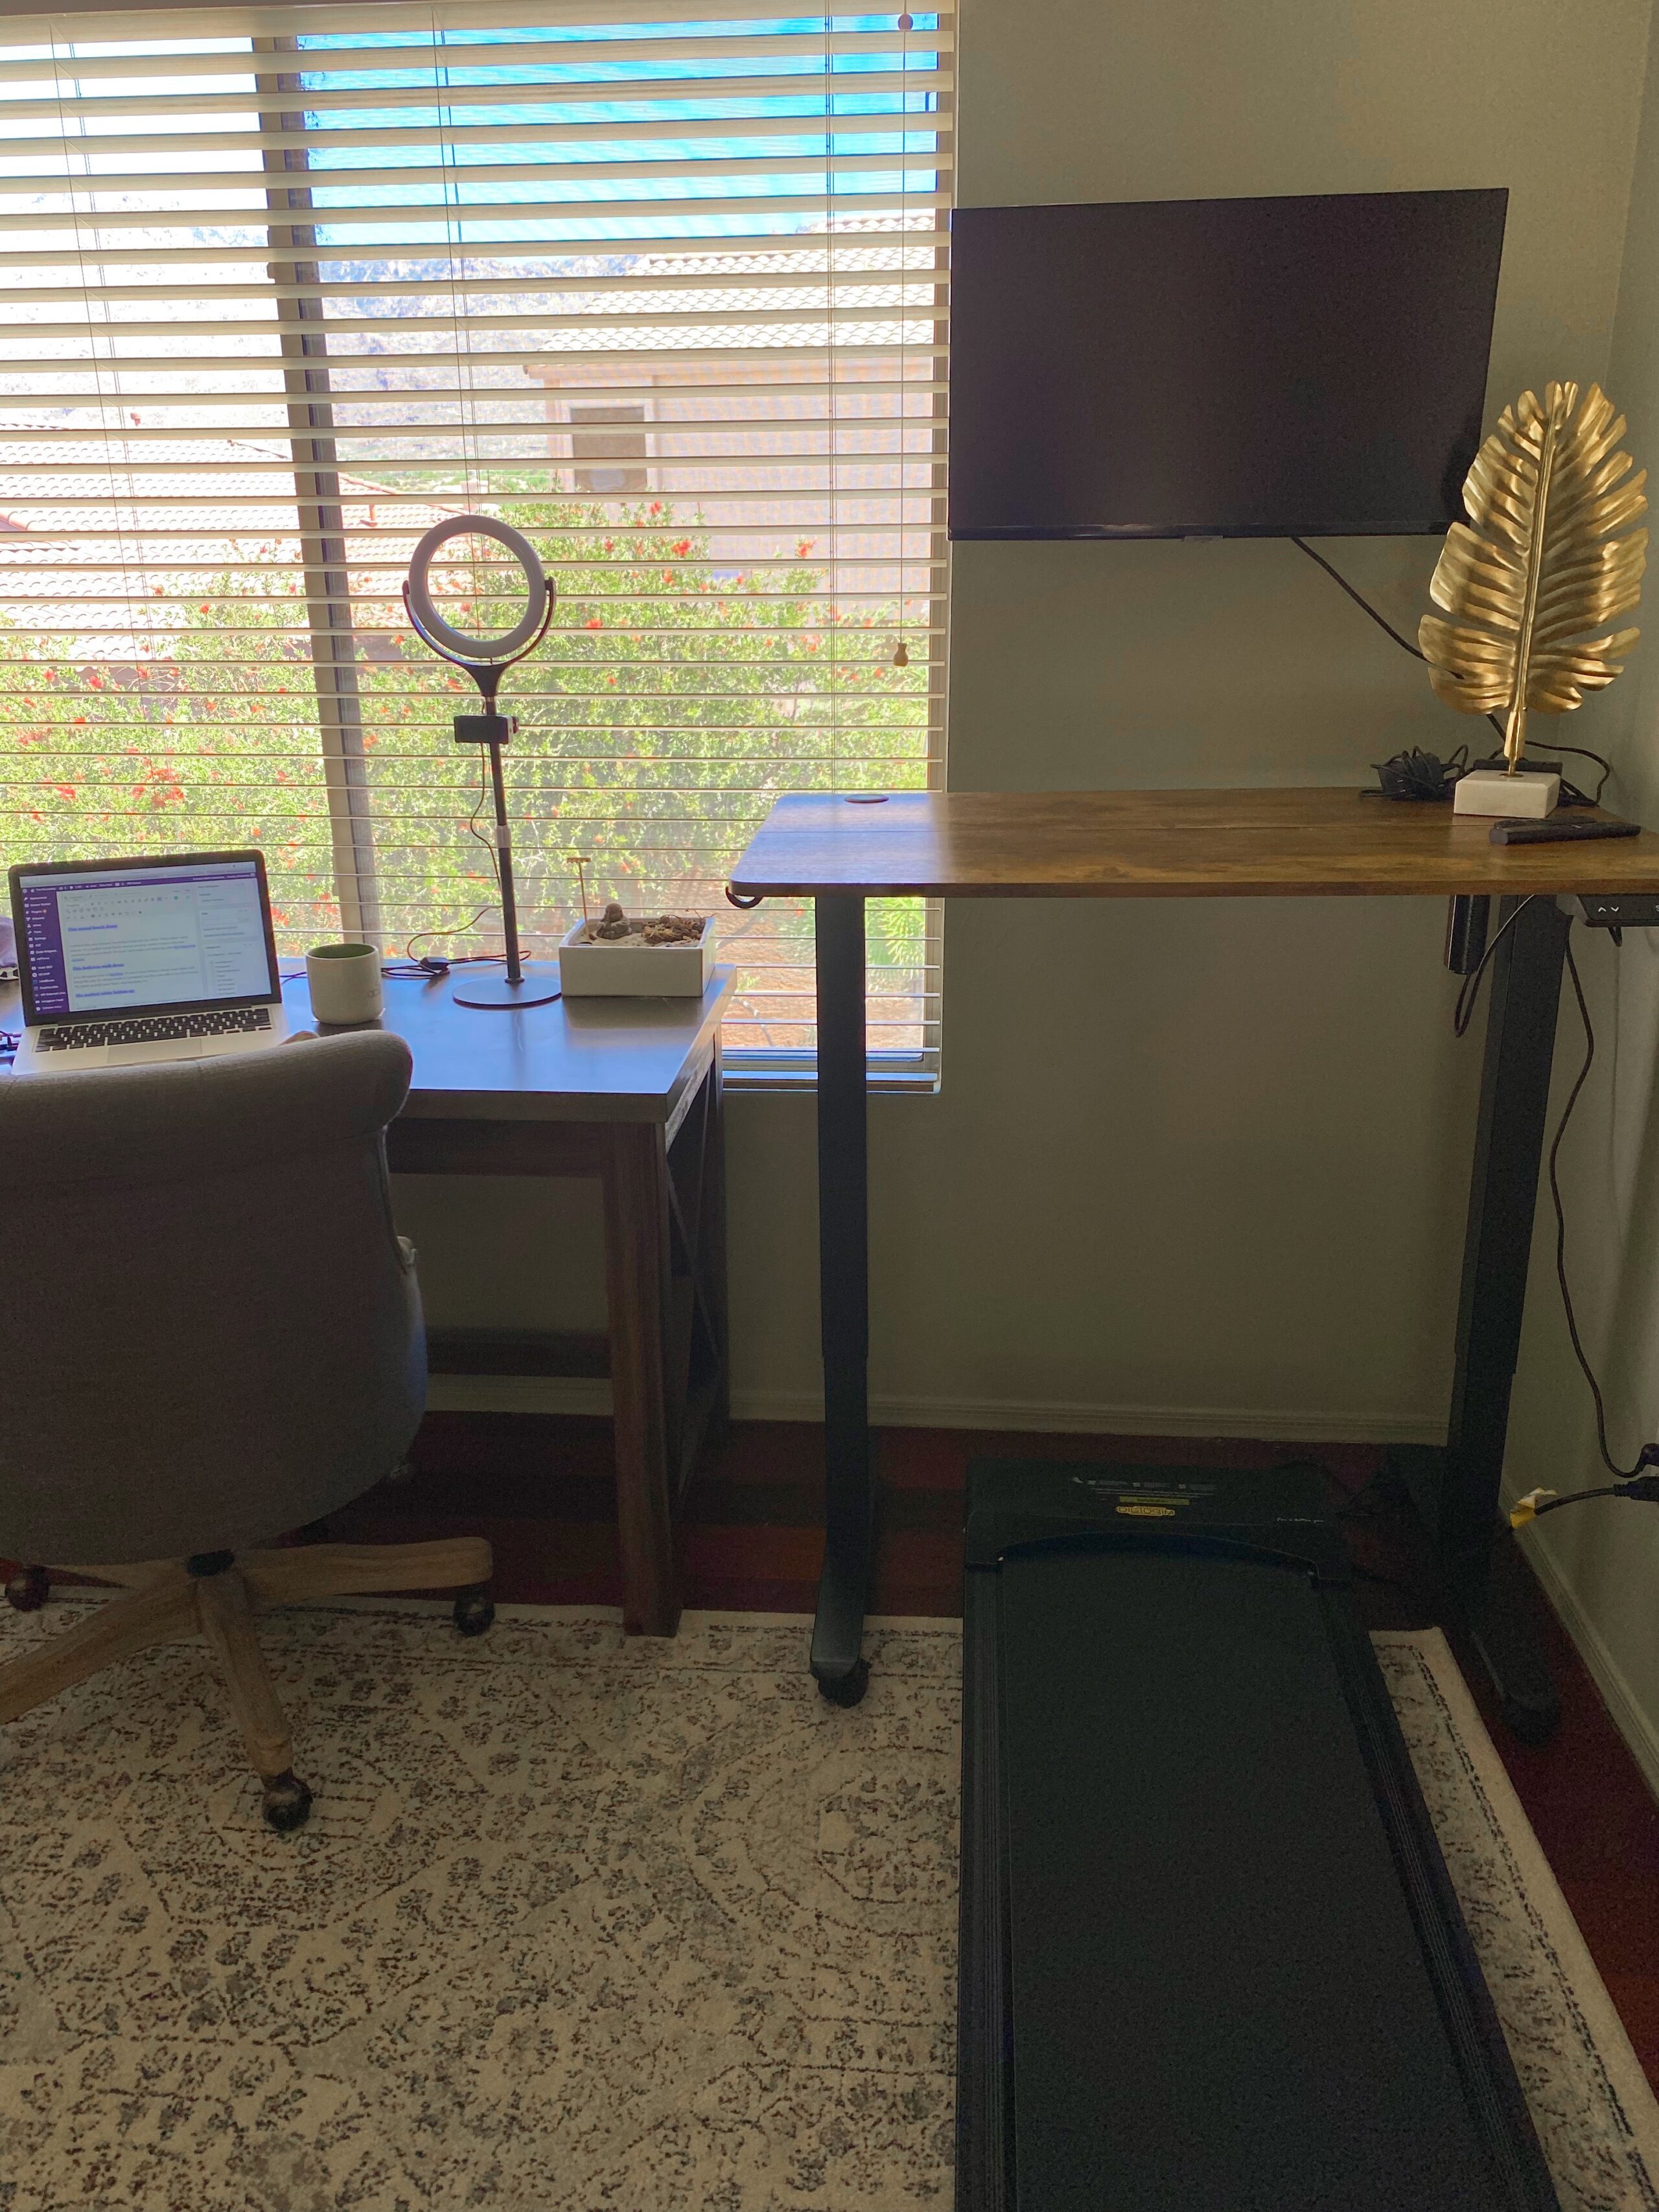
The Pilot thought my walking pad needed an upgrade, so he installed a wall monitor that’s eye level. It’s made such a huge difference! Also, it’s been very fun to play music watch a bit of Netflix while I’m working. (He used this mount for it, which enables me to rotate the screen and use it for workout streaming.)
So tell me friends: any new Amazon finds you’re loving??
Any summer travel must-haves? I’ll post my packing list once I get everything together!
xoxo
Hi friends! How was the weekend? I hope you had a wonderful one. Ours was filled with events – a very typical Maycember – but lots of fun time with friends and family. We had a birthday party, graduation party, dance party, and I taught a couple of classes.
It’s been a while since we’ve had a little catch-up post around here. While I wish I could have a green juice or coffee with you in real life, virtual will have to do for now. 🙂 So please grab a green juice or coffee, let’s share a giant pastry, and catch up a bit on life!
If we were having green juice right now…
I’d ask you about summer plans! I always love to hear what you’re up to over the summer, camps the kiddos are doing, and if you have upcoming travels.
I’d also tell you about our upcoming trip to Italy and Greece! I’m SO so looking forward to it (the scenery! the food! the SHOPPING) and the kiddos can’t wait, too. If you have any tips for jet lag, please send them my way lol.
Also, I’m having the hardest time finding sandals with a strap that don’t look like old lady sandals or toddler shoes. If you have any Europe sandals (with a heel strap) that are comfy for all day walking and still stylish, pleeeeease lmk. I don’t want to go the Birks or Tevas route, and am just looking for something neutral, comfy and cute! I’ll be wearing these unicorn sandals and my white Vivobarefoots while we walk around and explore.
If we were having green juice right now, I’d tell ya that I’m thisclose to finishing my Integrative Health Practitioner Level 2 certification and am so pumped about it. I could have blasted through the material and finished quickly, but I wanted to make sure I absorbed as much as possible and truly learned everything I could. I’ll also repeat modules to review material later on because it’s a LOT. I can’t wait to put this into practice, interpret real-life test results, and help clients and friends make some incredible and positive life changes.
I’d also probably tell ya about a program that I’ve been working on, and will be sharing later this summer/ early fall / when it’s finished. It really is the whole package and it’s something I wish would have existed when I was in the depths of my health journey. When I wanted to nap all day, couldn’t wake up in the morning, depending on sugar, had horrible anxiety, I wish this would have existed.
I’ll share more soon, but it’s going to be geared towards moms who feel completely burned out and want to find more joy and balance in their life. If you want the info first, just comment WAITLIST on this post (and that your email address with your comment is valid; it won’t be published but I can save it to send you the info when everything is ready).
If we were having green juice right now, I’d tell you that we’re a year and a half away from closing the chapter on military life. And since we’re just chatting and having a juice together, I’d tell ya the truth. I’m ready. The Pilot has had a long, wonderful career, I’m incredibly proud of him, and we’ve met some great friends. At the same time, I can’t even imagine what it will be like to have him home more often (even when he’s flying commercially again) without the pressure, instability, and urgency that often accompanies this life.
I’d want to know if you’ve found any new restaurants or enjoyed any new fitness classes lately. I’ve been LOVING Lagree – we don’t have a studio here but it’s something I enjoy taking when we travel- and hot yoga has felt extra amazing. Restaurant-wise, we have some places opening here in Tucson: True Food is FINALLY coming. For local fare, I definitely recommend BATA for my Tucson friends who haven’t been already.
So tell me, friends: what’s going on in your world? What are you looking forward to the most right now? Any summer travel plans? If you could design a wellness program to help with anything you’re experiencing, what would you include?? (<— this would help me a ton as I finish designing the framework!)
Happy Monday, friends. Thanks for being here today and I’ll see ya tomorrow!
xo
Hi friends! The weekend is heeeeere! What do you have going on? We have two birthday parties, a graduation party, and an end-of-dance season party. I’m looking forward to lots of fun with friends and I can’t believe the kids are done with school next week. We’re SO ready for summer! I’d love to hear what you have going on.
I’m also teaching barre, spin, and blasting through IHP content. I finally finished the massive Organic Acids module and have been learning so much. I’m excited to be able to offer these tests to 1:1 clients in the future.
For now, it’s time for the weekly Friday Faves party! This is where I share some of my favorite things from the week and around the web. I always love to hear about your faves, too, so please shout out something you’re loving in the comments section below!
Friday Faves
Life:
Mother’s Day surprise
The Pilot was supposed to leave on a work trip on Mother’s Day. I was a bit bummed about it, not because of the actual holiday – I knew we could just plan another day to celebrate together – but because I feel like he’s been gone a lot lately and was going to miss having him around.
I took the girls + my nana and mom to brunch at Hacienda del Sol as he left for the airport, and we were shocked when he walked into the dining room in his Peloton athleisure. 🙂 He was driving to the airport and his flight was canceled! It was an amazing surprise.
Brunch at Hacienda was perfect as always. I highly recommend their brunch (or even just dinner outside on the patio) if you’re visiting from out-of-town.
Health, fitness, + good eats:
Flash sale from my friends at EquiLife through this afternoon. 25% off and you can stack my code FITNESSISTA at this link for an extra 10% off for new clients. This is where I get my beloved quarterly detox and binder.
I recently bought their Para Support protocol and it’s part of the sale, too. (I’ll be doing a full blog post review on the protocol. A heads up: make sure your drainage pathways are supported first and I also recommend working with a practitioner for protocols. I’ve been working on liver health, dry brushing, and sauna for the past couple of years and felt like I was ready for something like this.)
Summer accountability challenge is coming May 29th! Mark your calendars and stay tuned for the details next week. It will be a two-week free health and fitness challenge with lots of group motivation and prizes for checking in. 🙂
After years of searching, I FINALLY found a nontoxic shampoo and conditioner that I love and that works for my long hair. I was interviewed for the IHP Success Podcast, and while we were chatting, Julia Hayes told me about Under Luna. She has the most ridiculously gorgeous hair I’ve ever seen, so I was willing to step out of my Costco shampoo comfort bubble and try something new.
I bought the trial bottles of Warrior Shampoo and Revive Conditioner and decided to give it a whirl.
It takes a little while to get used to *clean* shampoo, because they don’t contain the foaming agents of traditional hair care. It doesn’t bubble and froth in the shower; but it definitely feels clean afterwards. It also smells amaaaazing. I still use Moroccan oil on my ends. The biggest differences I’ve noticed: hardly any hair falls out in the shower, and I’ve had a ton of new growth around my temple.
Before, it was very common for me to have a nice handful of hair in the shower (gross, but real). Now, it’s maybe less than 10 strands. It’s been mind-blowing! I’m definitely converted and will be using this from now on.
The best part? Under Luna saw my Instagram stories and kindly offered a 10% discount code for my reader friends. Just click here and use FITNESSISTA at checkout!
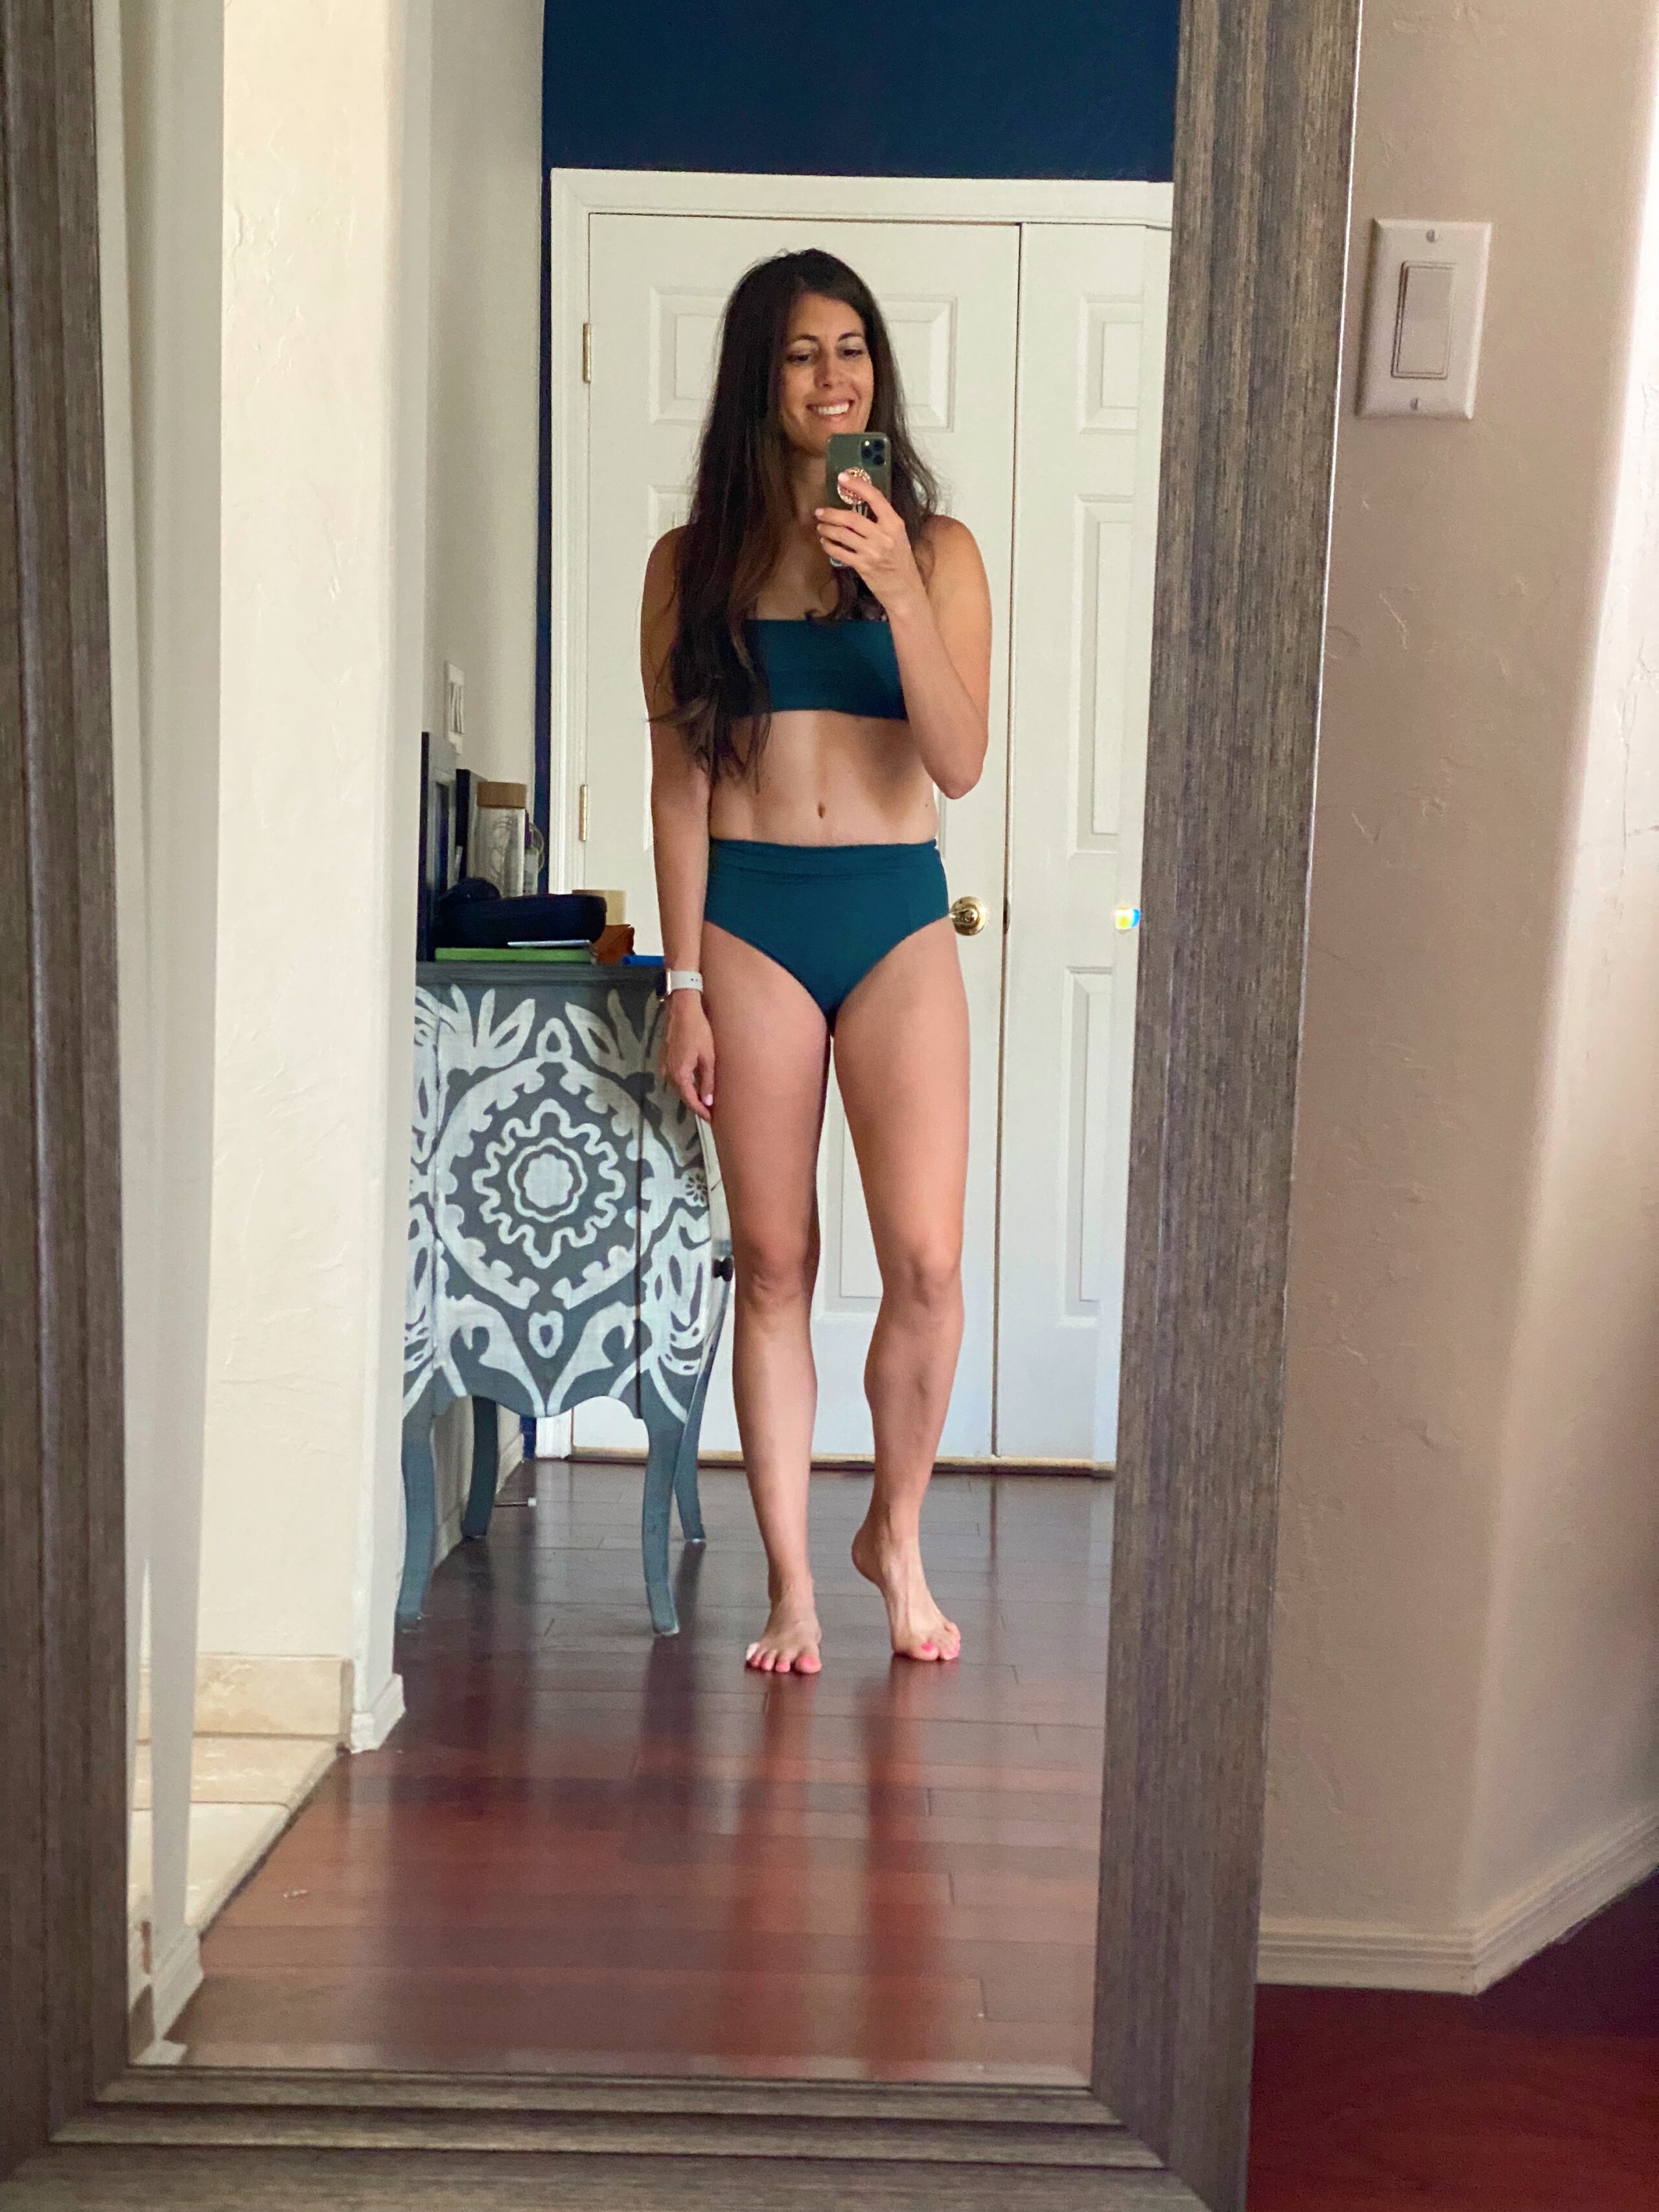
Vuori swim! I told ya I’d report back on their swimwear and it.is.awesome. It’s the same dreamy soft stretchy fabric we all love, and the fit is excellent. I’m always a bit wary about buying swimsuit online, but it fit true to size and feels like everything will stay in place. These are the dune bottoms and dune top, and while the bottoms are a tiny bit cheeky, it’s enough to be on trend without being *too much.* I think it’s my new fave swimsuit!
Obsessed with this Amazon set. It was only $35 and they have a ton of colors. It’s shorts, a cropped-ish top, super comfy yet put-together.