The Bent-Over Row: The Ultimate Guide for Dumbbell and Barbell Row Training
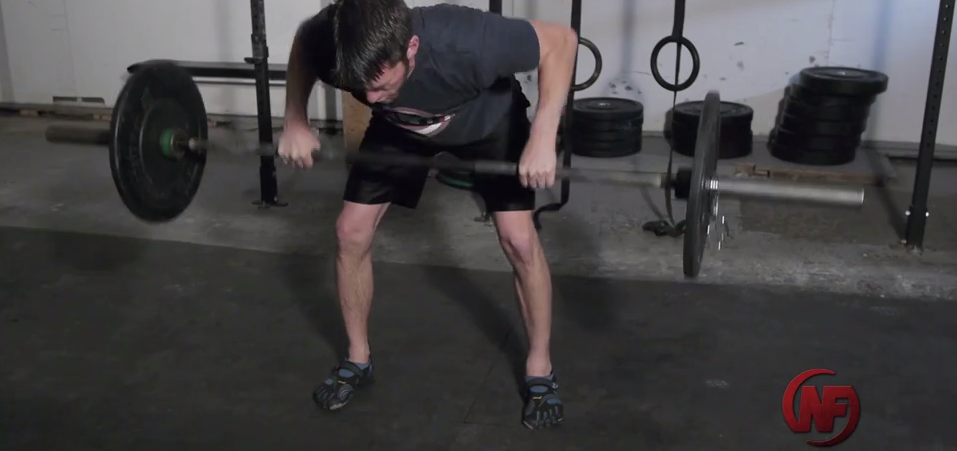
If you want to learn how to perform the bent-over row, you’ve come to the right place!
We help many of our coaching clients jumpstart their strength training practice, including how to perform rows safely and effectively.
Today we’ll show you exactly how our clients get started with bent-over rows.
Here’s what we’ll cover in today’s guide:
- What muscles does the bent-over row work? (Why you should do rows)
- Row Level 1: One-Arm Dumbbell Row
- Row Level 2: Bent-Over Dumbbell Row
- Row Level 3: Bent-Over Barbell Row
- Are bent-over rows dangerous?
- When should I do rows in my workout? (Getting started)
A quick note: we have compiled ALL of our strength training content into a comprehensive guide that will remove all the confusion and answer all the questions you have about weight training!
Grab our guide, Strength Training 101: Everything You Need to Know, when you sign up in the box below!
- Everything you need to know about getting strong.
- Workout routines for bodyweight AND weight training.
- How to find the right gym and train properly in one.
What Muscles Does the Bent-Over Row Work?

Bent-over rows are a great way to train your “pull” muscles:
- All of your back muscles
- Your biceps
- Your forearms
- Your grip
- All the stabilizer muscles in between that make those muscles work together.
If you’ve been doing bench presses regularly, start doing an equal amount of work with your pull muscles to stay in balance and away from injury.
Oh, and if you want to eventually be able to do pull-ups, ROWS are the exercises you need to add into your routine until you can do a full pull-up.
Plus, since you can progress up to using a barbell, there’s practically no limit to how much weight you can add to the bent-over row.
This is key for “progressive overload,” meaning you lift more weight than you did last time. Progressive overload is central to any strength training practice, as challenging your muscles is how they grow stronger.
However, we won’t just hand you a barbell and wish you luck. That would be cruel.
Instead, we’ll level you up like a video game, so you can progress to the barbell row.

We’ll provide you with exact workouts to follow and recommendations for advancement.
Our first stop will be…
Row Level 1: One-Arm Dumbbell Row
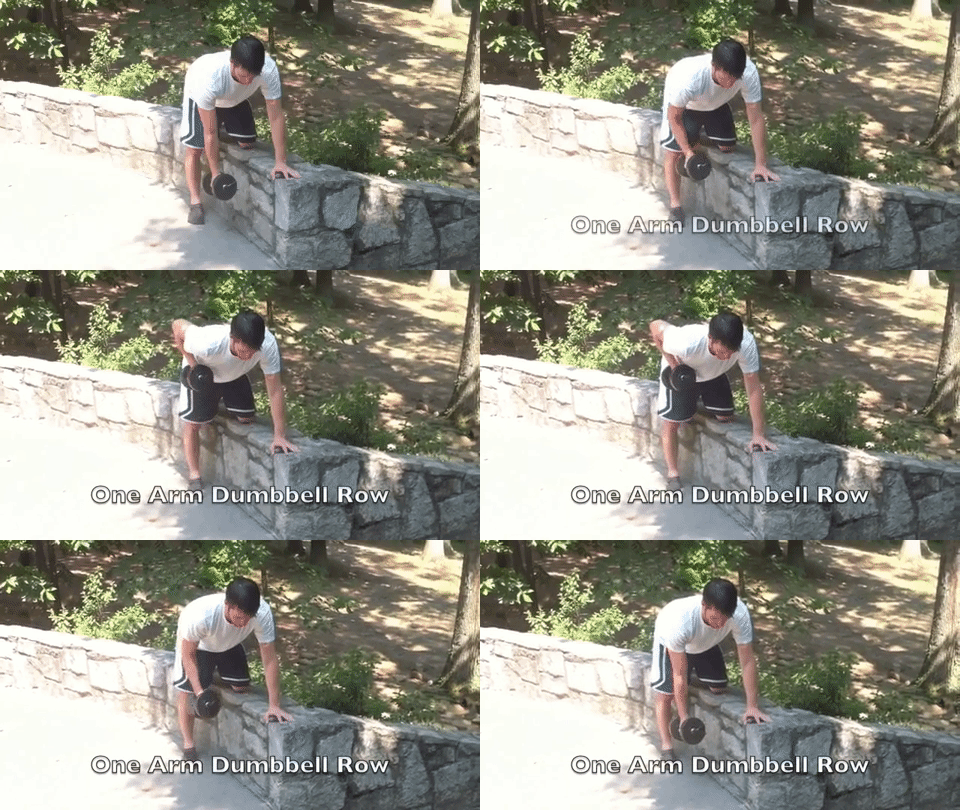
We’re going to start with one-arm bent-over dumbbell rows, the most basic of back exercises.
The bench will offer some added support here too.
Row Workout Level 1: One-Arm Dumbbell Row
- Bent-over dumbbell rows: 8 reps each arm (or as many as you can do)
- Rest for a 2-minute break
- Do another set
- Repeat until you hit 3 sets
Here’s a video tutorial showing you exactly how to perform the one-arm dumbbell row on a bench:
What weight should you start with initially?
Whatever allows you to get to at least 5 reps a set.
This will allow you to get stronger and stronger.
Make sure you give yourself at least 48 hours until you do the Level 1 Dumbbell Rows again, so you can include rows for your workouts on:
- Monday
- Wednesday
- Friday
As soon as you can do 3 sets of 8 reps (each arm), it’s time to move up to a heavier dumbbell.
Once you can lift a 15-pound (5kg) dumbbell or heavier, consider moving up to the next level.
Want help designing your own workout routine? I’ve got two options for you.
The first is to head over to “Build Your Own Workout Routine” and get your hands dirty. Our guide will walk you through building a full-body exercise program in 10 simple steps.
The second is to have a Nerd Fitness Coach do all the heavy lifting for you (not really, you still have to lift stuff), by having them build you a tailor-made workout routine:
Row Level 2: Bent-Over Dumbbell Row
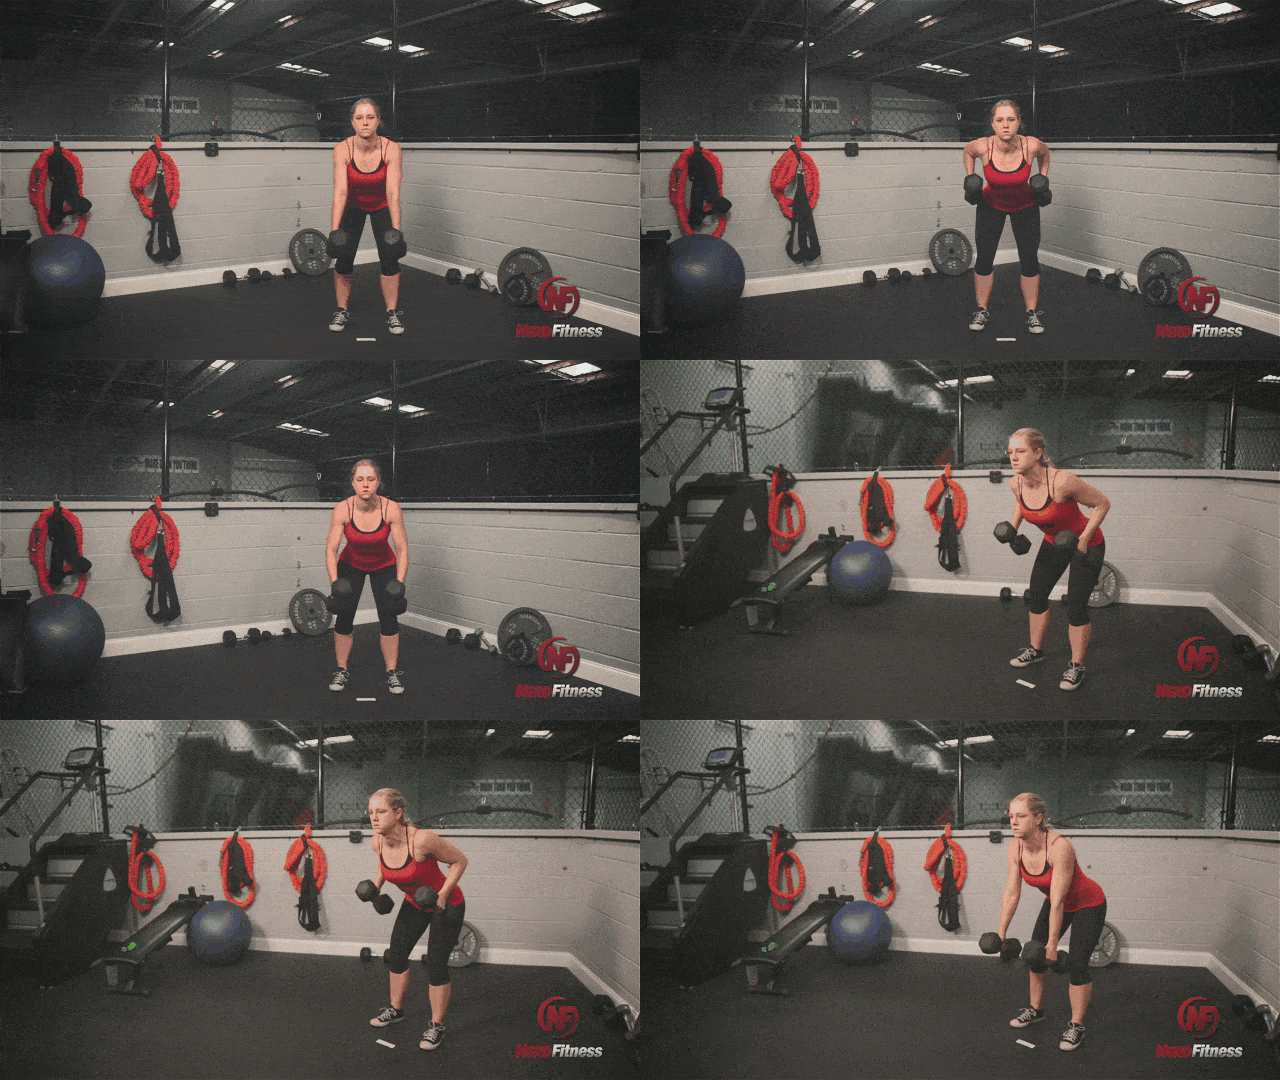
It’s now time to do a proper bent-over row!
We’ll use dumbbells to start, as the barbell itself may be too heavy.
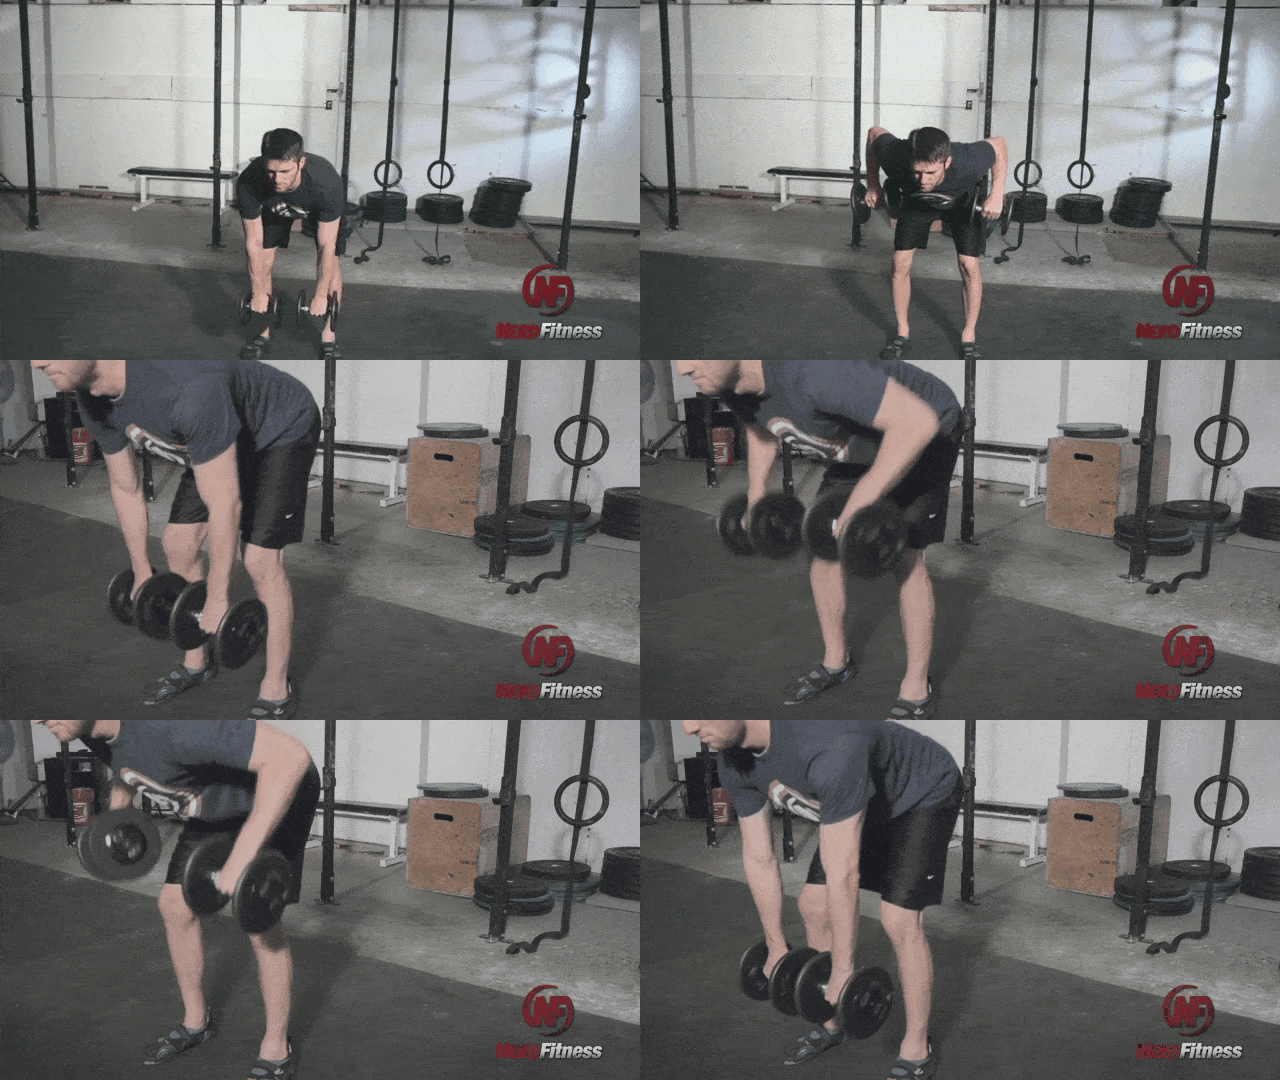
Here’s how to perform the Bent-Over Dumbbell Row:
- Stand with a shoulder-width stance.
- Grab the dumbbells with your palms facing each other.
- Bending your knees slightly, and your core tight, bend over at the waist keeping your lower back tight.
- Bending over until your upper body is at a 45-degree bend or lower, pull the dumbbells up towards your lower chest, on the side.
- Keep your elbows as close to your sides as possible.
- At the top of the movement, you should feel like you are pinching your shoulder blades towards each other.
- Pause, and return the dumbbells to your starting position.
Boom!
Here’s a video tutorial showing you exactly how to perform the row:
Aim to do 3 sets of 8 reps for your dumbbell rows.
Again, a Monday-Wednesday-Friday training schedule will give you time to recover between movements.
You’ll need to be able to do bent-over dumbbell rows with at least 20 pound (10kg) weights before advancing onto the next section, as the barbell itself weighs 45 pounds (20kg).
Row Level 3: Bent-Over Barbell Row
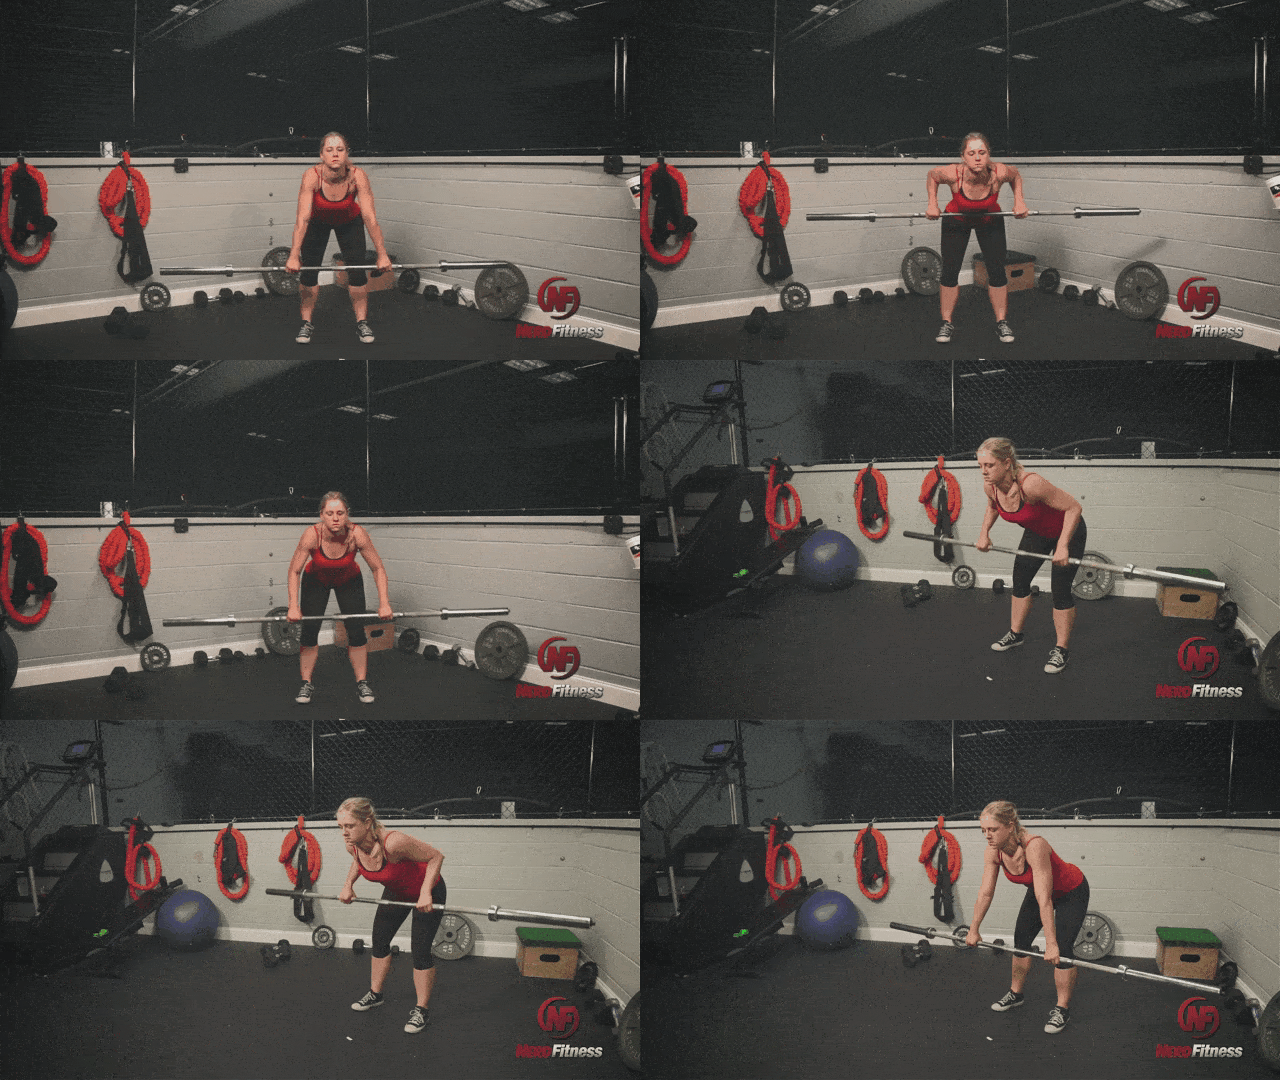
My dear Rebel, it’s time to perform the bent-over row with a barbell!
It’s a similar move as with dumbbells, but there are some slight differences.
The Bent-Over Barbell Row is performed as follows:
- Stand with a shoulder-width stance.
- Grab the barbell, wider than shoulder-width, with an overhand grip.
- Bending your knees slightly, and your core tight, bend over at the waist keeping your lower back tight.
- Bending over until your upper body is at a 45-degree bend or lower, pull the bar up towards your lower chest.
- Keep your elbows as close to your sides as possible.
- At the top of the movement, you should feel like you are pinching your shoulder blades towards each other.
- Pause, and return the barbell to its starting position.
There you have it! You are now rowing with barbells!
Want a video tutorial showing you the movement, step-by-step? You got it, but only because you asked nice:
To ensure you have the setup correct, record a clip of yourself and match it here against our videos and gifs. If they look close then you’re doing great!
If you want to have a trained professional review your form, our coaches can do just that in our spiffy app!
Are Bent-Over Rows Dangerous?

There’s nothing inherently dangerous about performing the bent-over row.
However, as with just about any exercise, if you have bad form you might open yourself up to injury.
That’s why it’s critical you get the movement down before you start adding all sorts of extra weight.
Record yourself with some light dumbells or just the bar. How does it look? Make sure it semi-resembles our vids and gifs here before you start lifting more weight.
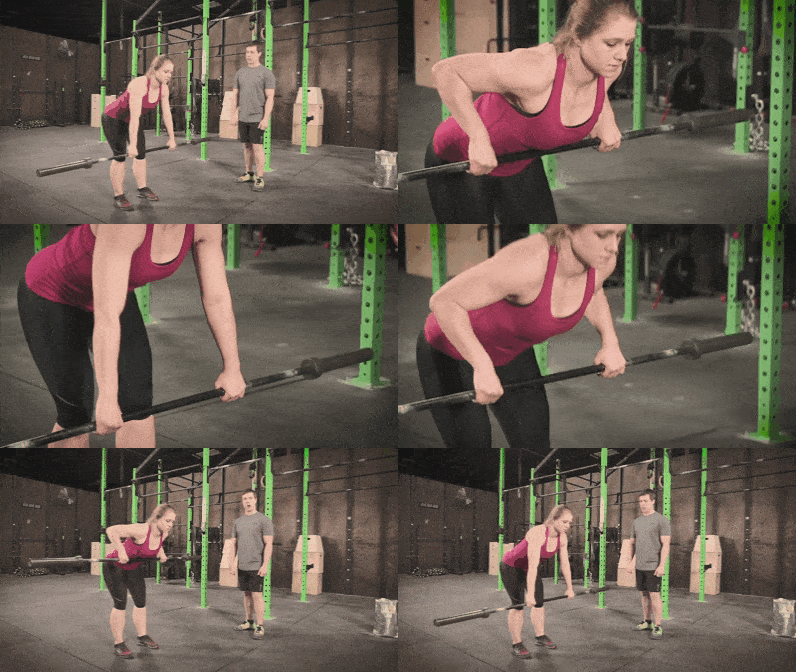
Here are three common faults when performing the bent-over row:
- Letting your lower back round. You want to keep your back straight during this movement. You don’t want to put unnecessary pressure on your lower back.
- Letting your body dip with the movement. Don’t bring your body down to the weight. Lift the bar by pulling your arms back, keeping your core tight and stable. That’s why this is a “pull” exercise.
- Bouncing the bar. Keep the bar moving in a slow and steady motion throughout the movement. Don’t bounce the bar on the return up. Letting the bar bounce at the bottom will disrupt your form. That’s just asking for trouble.
If you’re still concerned about the possibility of hurting yourself while doing the bent-over row, consider training with the inverted bodyweight row. It’s personally my favorite row because of the lower chance of injury.
When Should I Do Rows in My Workout? (Getting Started)
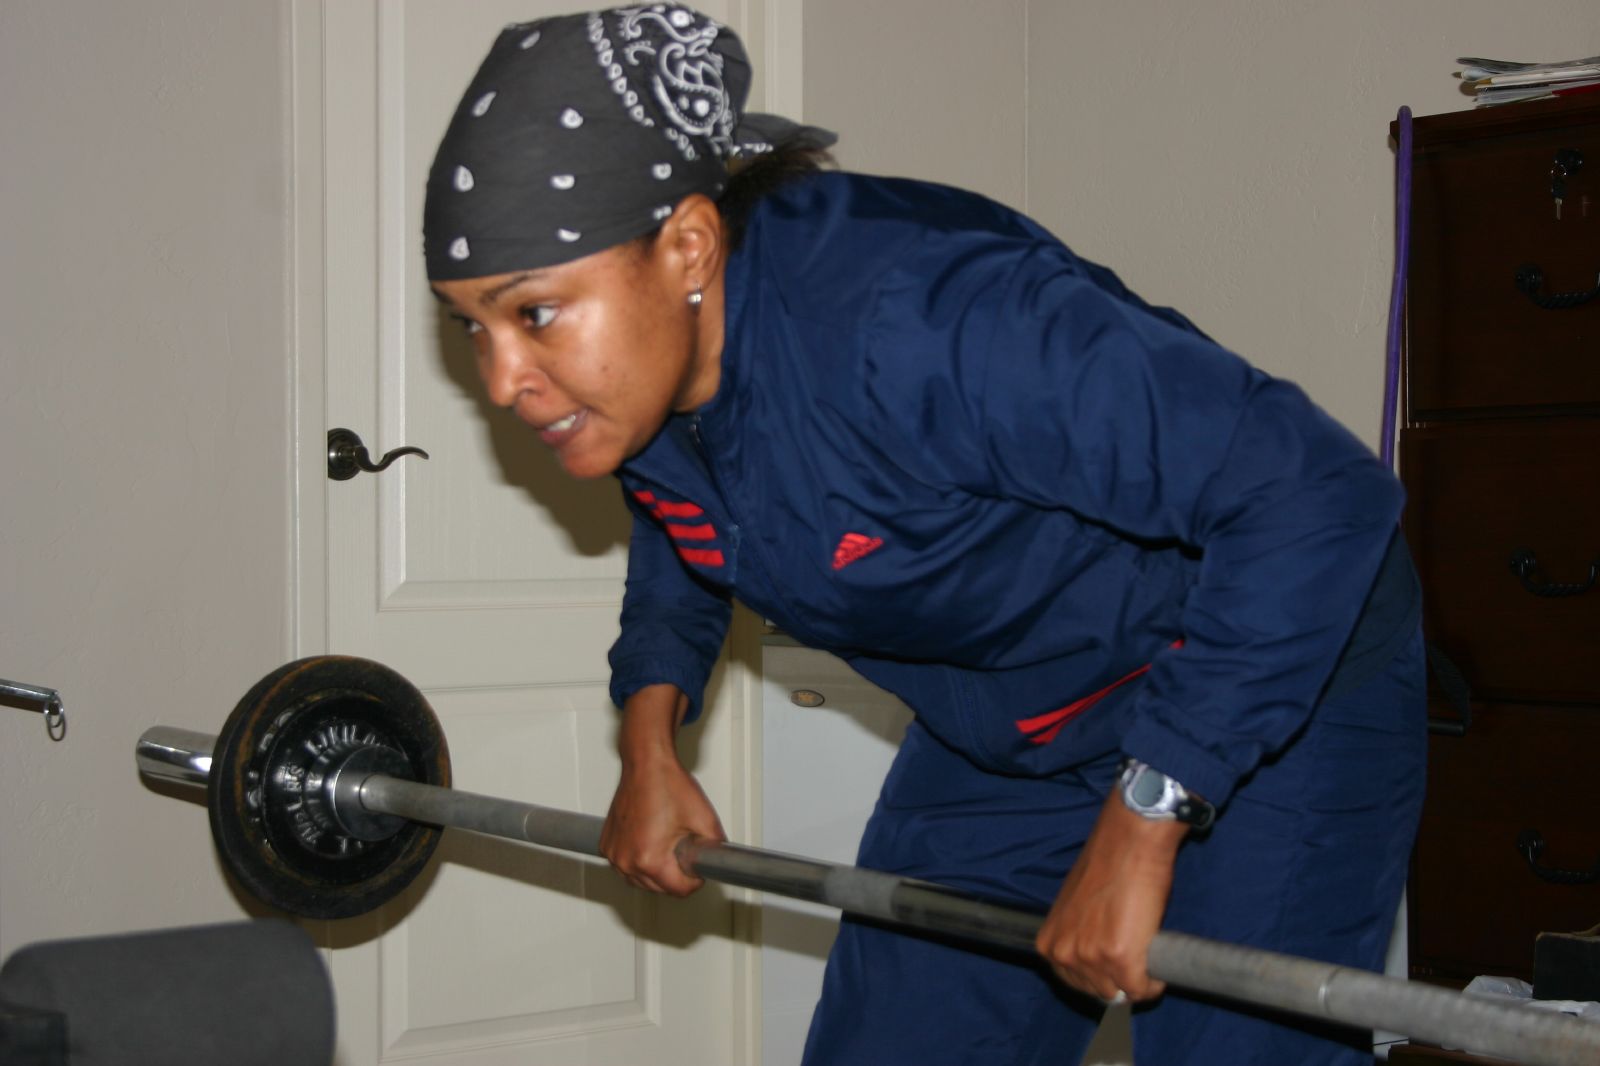
The only question left to answer is when to do your rows.
For that, it’s time to build a full-body workout.
We generally recommend our coaching clients complete a full-body strength training workout 2-3 times per week.
Such a full-body routine would include your:
- Quads (front of your legs).
- Butt and hamstrings (back of your legs).
- Chest, shoulders, and triceps: (“push” muscles).
- Back, biceps, and grip ( “pull” muscles).
- Core (abdominals and lower back).
The bent-over rows would fulfill “pull” muscle exercises. So would pull-ups or bodyweight rows.
If you went with our Monday-Wednesday-Friday schedule mentioned earlier, you could do:
- Monday: Bent-Over Dumbbell Rows
- Wednesday: Pull-Ups
- Friday: Inverted Bodyweight Rows
All you’ll need are some lower body, push, and core exercises and you’ll have a full-body program. Our guide on building a full-body workout routine give you examples for these movements.
Want a little more help getting going? You seem like a nice person, so I’ll share with you our top suggestions for next steps:
1) If you want step-by-step guidance, a custom weight training program that levels up as you get stronger, and a coach to keep you accountable, check out our killer 1-on-1 coaching program:
2) Good at following instructions? Check out our self-paced online course, the Nerd Fitness Academy.
The Academy has 20+ workouts for both bodyweight or weight training, a benchmark test to determine your starting workout, HD demonstrations of every movement, boss battles, meal plans, a questing system, and a supportive community.
3) Join the Rebellion! We need good people like you in our community, the Nerd Fitness Rebellion.
Sign up in the box below to enlist and get our guide, Strength Training 101: Everything You Need to Know. It’ll help you start incorporating rows into your training.
- Everything you need to know about getting strong.
- Workout routines for bodyweight AND weight training.
- How to find the right gym and train properly in one.
Alright, enough from me. Now it’s your turn:
Do you train with bent-over rows?
Dumbbells or barbells?
Do you stick with inverted bodyweight rows?
Let us know in the comments!
-Steve
PS: Make sure you read the rest of the articles in our Strength Training 101 series:
- Strength Training 101: Finding the Right Gym
- Strength Training 101: Where do I start?
- Strength Training 101: How Much Weight Should I Be Lifting?
- Strength Training 101: The Bench Press
- How to Hire a Personal Trainer
###
Photo source: Barbell Rows.
GIF source: Final Fantasy.
from Nerd Fitness https://ift.tt/31B6JEp
0 comments:
Post a Comment